Hosting your website just less than 1USD with amazon web services (AWS)
Transfer your domain to Route53 and upload your static website to S3, and Finish
Previously, hosting a website with a shared hosting service is popular but it also has some disadvantages due to lack of manageabilities, developer tools, and supports. Nowadays there are many cloud services such as Amazon Web Service (AWS), Digital Ocean, Microsoft Azure, Google Cloud, Alibaba Cloud, etc which enable the easiness of managing your own website without going with the shared hosting solution, and the pricing is also acceptable. Therefore, the trend nowadays is everyone is going to the cloud because of affordable price, built-in features, and support.
Amazon Web Services offers cloud web hosting solutions that provide businesses, non-profits, and governmental organizations with low-cost ways to deliver their websites and web applications. AWS does not only provide service for hosting your website but also get you to access many cloud solution that you and your business needed. Furthermore, hosting a static website with AWS is super simple and costs less because you have to pay less than 1USD for AWS Route53 hosting zone and your static website is ready to go live.
Step 1: Preparation of Your Static Website Content
In this step, you can use HTML, CSS, and Javascript to design your static website. Your static website can be your personal portfolio, your graphic design work, your background information, etc just like you can see in the sample below. Another option you can have your static website ready is by taking free or paid templates on the available market as well. Outsource to freelancers is also an option to have your static website ready.

Step 2: Create a new AWS account, if you don't have one yet, and buy a domain name from GoDaddy
Follow this step to create a new AWS account and click here to visit the GoDaddy website to buy a domain
Step 3: Transfer your domain from GoDaddy to AWS Route53
The reason to transfer the domain from GoDaddy to AWS Route53 is that we want to fully manage our website in AWS without any connection to GoDaddy. Still, you can keep everything in GoDaddy and host your static website in AWS too. Either way is fine. The actual work we have to do here is to replace the default nameserver given by GoDaddy when buying a new domain with the nameserver provided by AWS Route53 when creating a new hosted zone. You can follow the below steps in order to transfer the domain from GoDaddy to Route53
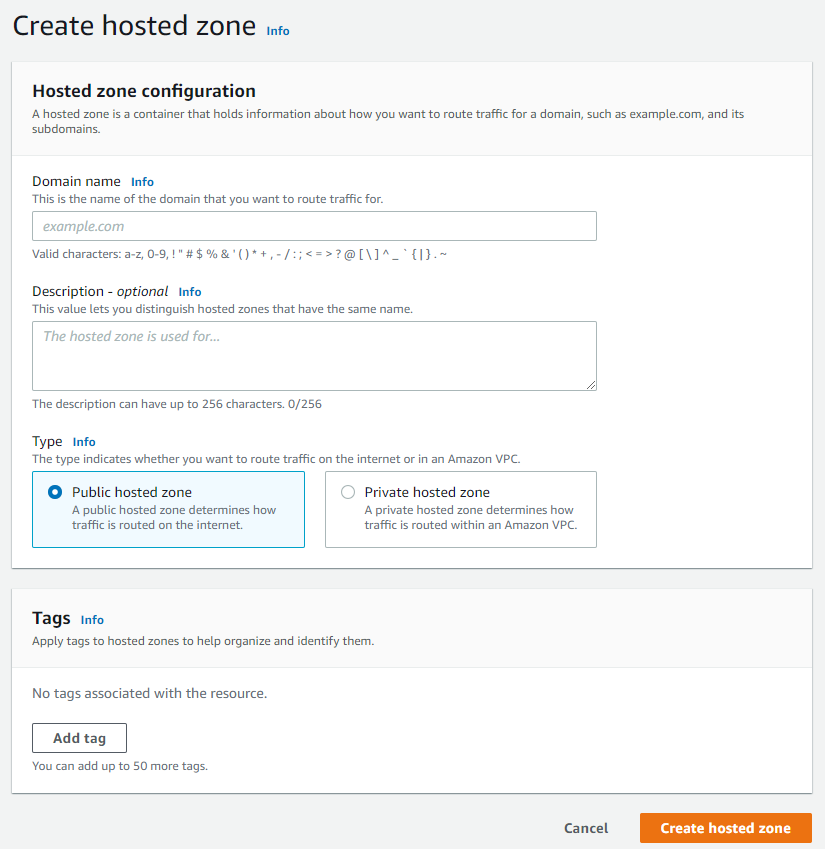
- Create a new hosting zone in AWS Route53.
- Login to AWS account, click on service Route53 then add a new host zone by filling in the domain name, description and select public hosted zone
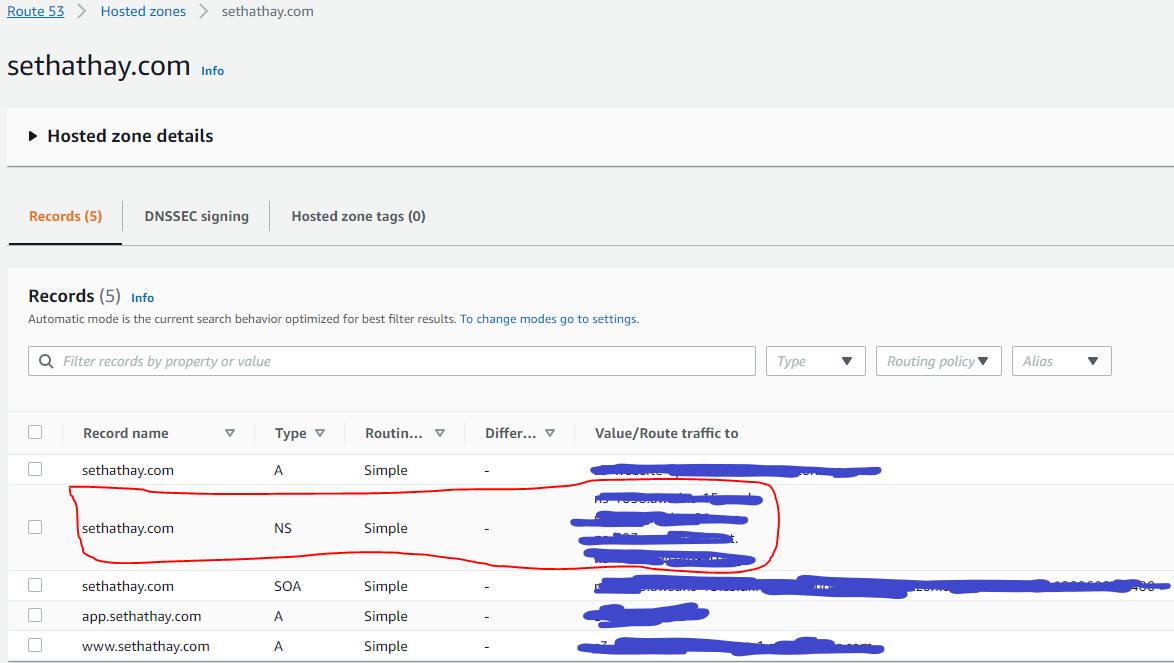
After clicking the button "Create hosted zone", you will see your newly host zone in the table list, click on the domain name you will see the detailed information as below. You will need the nameserver information to replace nameserver in GoDaddy in the next step
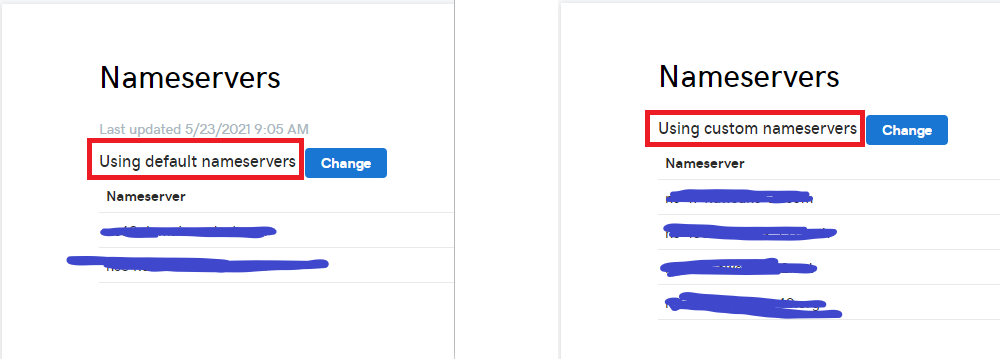
- When buying a domain from GoDaddy, you will get a domain name example sethathay.com and also information of nameserver which is provided automatically by GoDaddy to your domain. This nameserver is like a robot finder that functions to look up your domain when a user types your domain URL in a web browser.
Now, all we have to do is to change the nameserver created by GoDaddy to the nameserver of AWS Route53 and waiting up to 48 hours to take the effect of this change.
Step 4: Create S3 Bucket to Upload Your Static Website Content
AWS S3 is cloud storage managed by AWS used to store files, video, images, etc. In this "HOW-TO" we are going to use it as storage to keep static website content. Within AWS S3 you can create buckets as much as you want. Therefore, let start to create one.
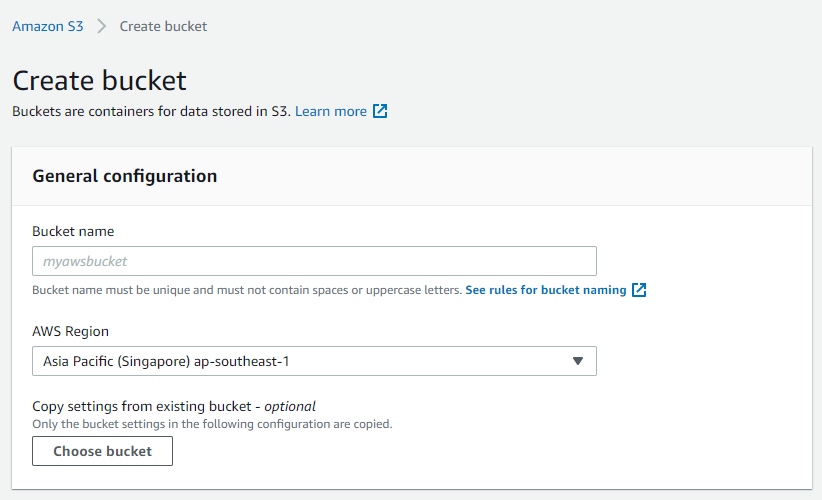
- Go to service S3 of AWS, Click create new bucket button and giving bucket name, then select AWS Region
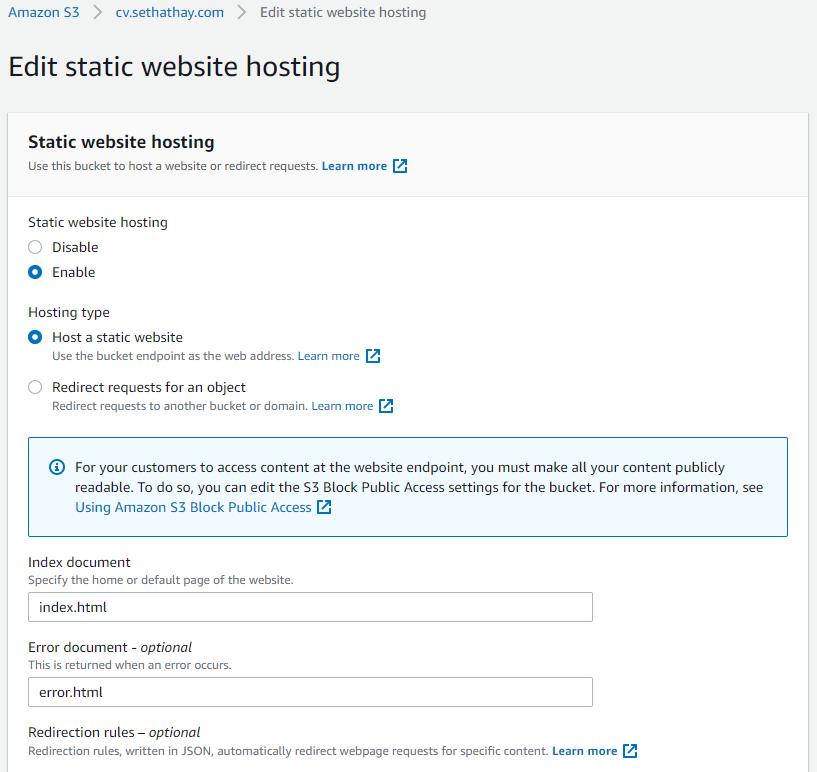
- Go to the properties tab of your bucket, and enable static website hosting
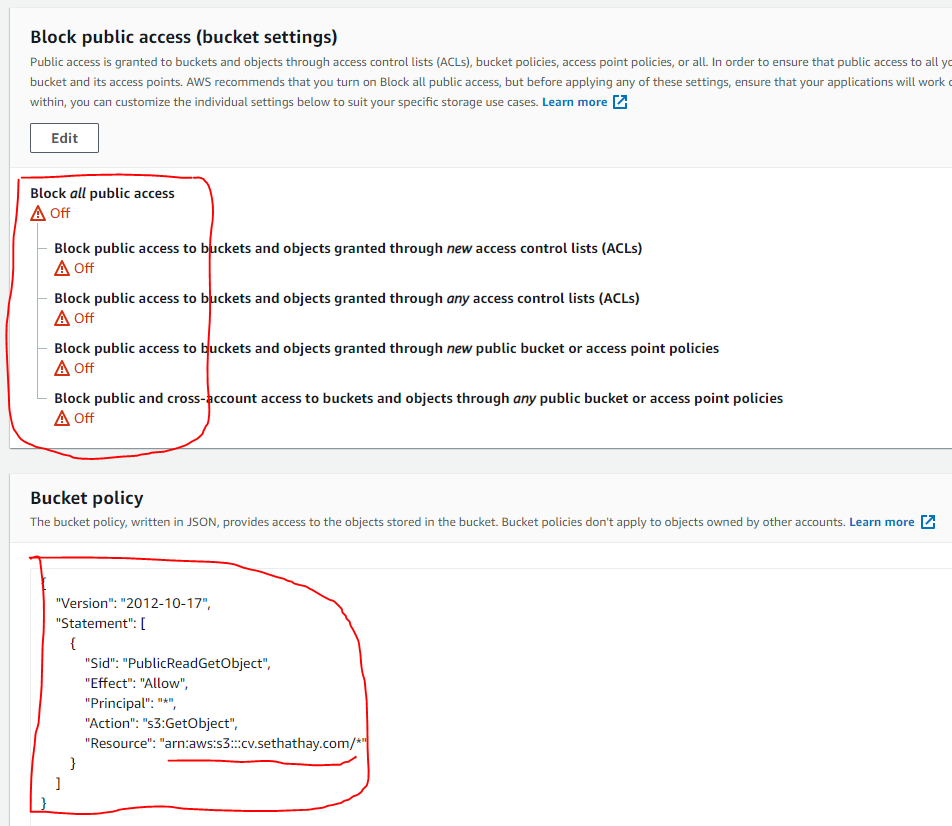
- Go to the permissions tab of your bucket, and allow public access and policy to the bucket
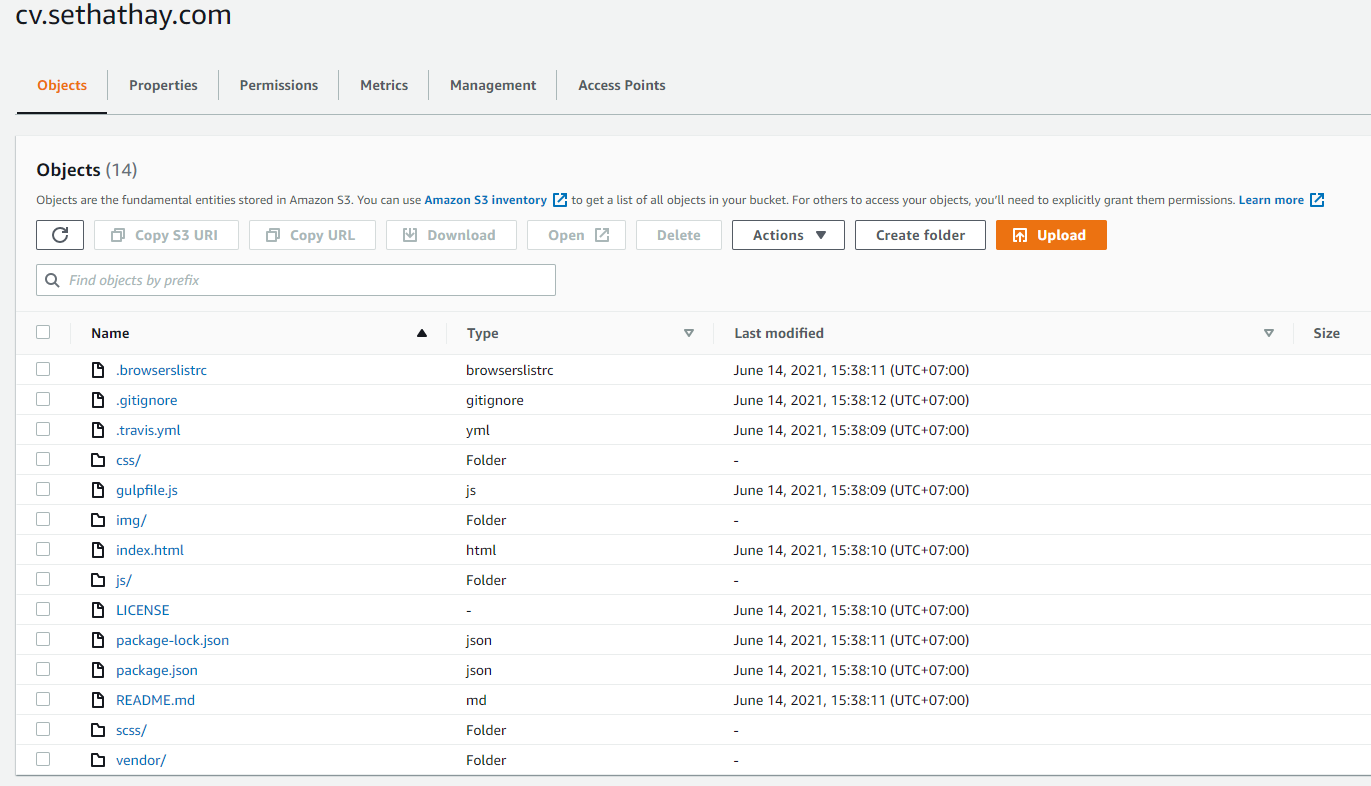
- Upload your website content to the S3 bucket
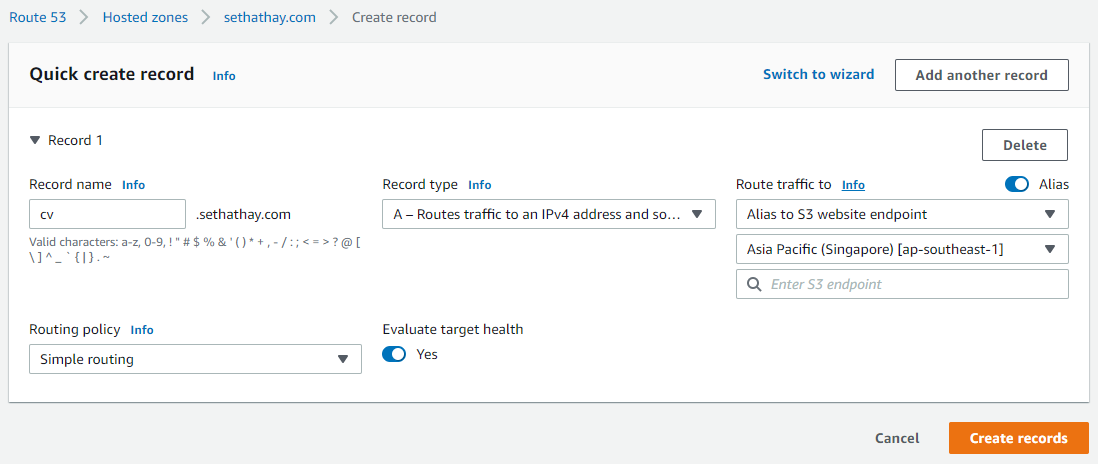
Step 5: Point AWS Route53 to AWS S3 bucket through an "A Record"
- Create Record, Enter Record name
- Choose "A Record" Type
- Select Route Traffic to Alias to S3 website endpoint, Select Region, and Choose S3 Bucket Name
- Finally, DONE. Now let's open the browser, then type the URL of your domain example: cv.sethathay.com

THANK YOU, ANY QUESTIONS AND COMMENTS FEEL FREE TO CONTACT ME !!!!
About author

SETHA THAY
Software Engineer & Project Manager. I am willing to share IT knowledge, technical experiences and investment to financial freedom. Feel free to ask and contact me.
You may also like