Stoplight Your Best Friend for Document Your Rest API
Using Stoplight you can create OpenAPI descriptions, documentation, mock servers much faster than other API tools, with no specialized knowledge and experiences required in design the specification. There are several ways to define an OpenAPI specification document. You can auto-generate from annotations in your source code, or you can handle in a tool editor such as Swagger Editor or other GUI tools. The stoplight is one of GUI tool which can easily document your complex Rest API endpoint. As a result of Stoplight, you can get a standard OpenAPI 3.0 specification in JSON or YAML format file which compatible to integrate with Swagger UI to demonstrate your endpoint just like Postman.
If you are using Laravel as your back-end to generate Rest API and looking to document by annotation, you can try these two packages, swagger-php, and L5-swagger. The difference between using annotation and GUI tools is that you can annotate your Rest API endpoint while developing it. In contrast, using the GUI tool allows you to define your preferred REST API before even starting code. It is also easy to share and discuss within your team.
In this post, I am going to demonstrate to you how you can define your Rest API specs using Stoplight and how you can use the exported JSON file to integrate with Swagger UI to replace Postman. 


STEP 1: Download and Install Stoplight for Your OS
- Search google with the keyword "stoplight' or click here https://stoplight.io/api-design/ to download stoplight studio

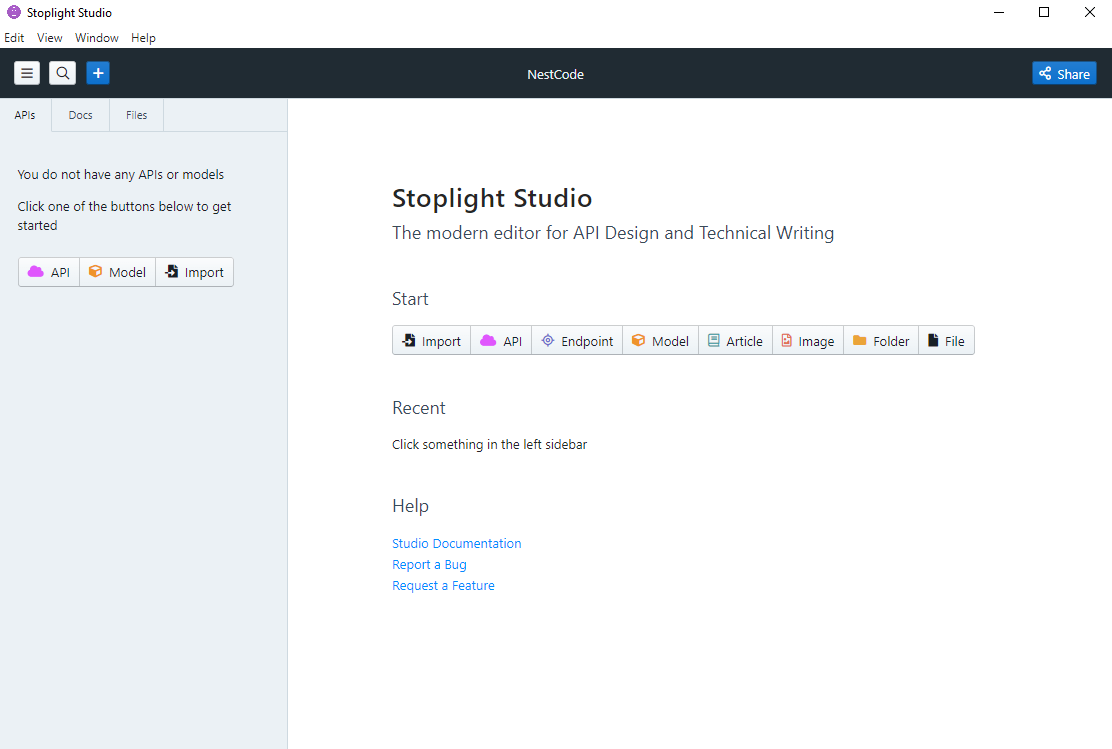
- Open stoplight studio and given the name of your new project, then click the button create

- It will bring you to the dashboard
STEP 2: Define Your REST API
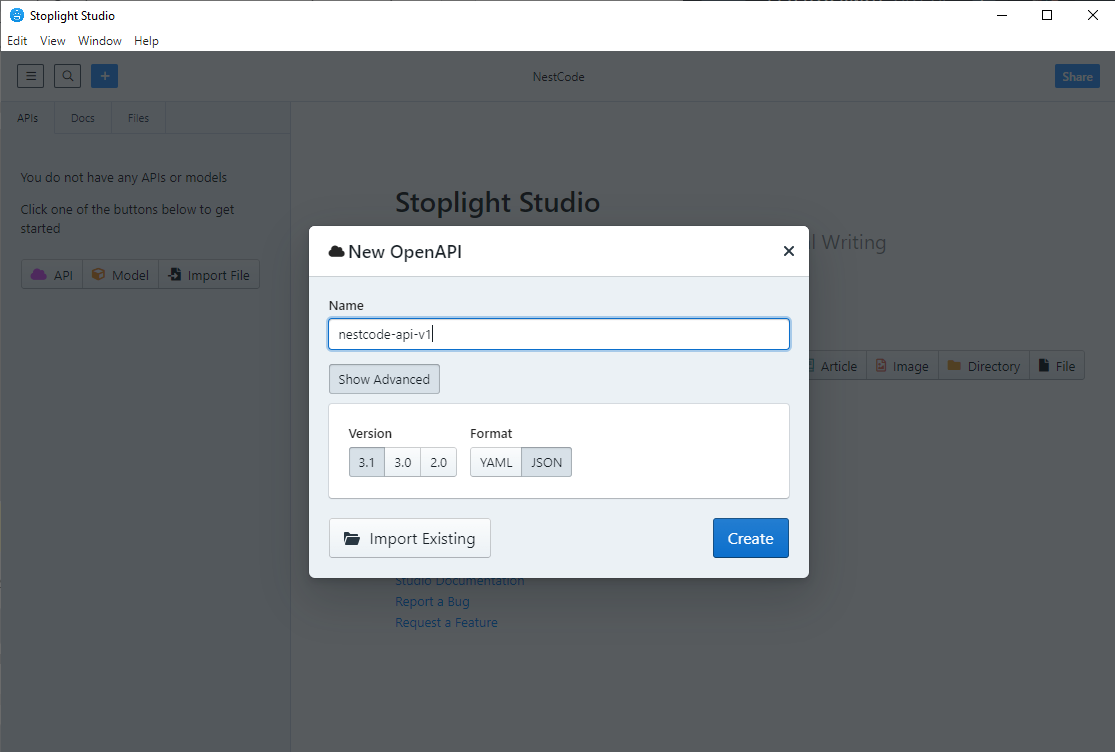
- First, you click on API and given the name of OpenAPI, select advance setting choose JSON format with the version 3.0 of OpenAPI specification that you want, then click the button create
- Do not choose version 3.1 since swagger UI didn't support the 3.1 OpenAPI specifications yet.
- In API Overview, you can define some info of your overall REST API endpoint as
- Description: You can describe a detailed description of your Rest API
- Servers: You can define your REST API Server endpoint based on your environment (Dev, Stage, UAT, Prod, etc...)
- Security Schemes: You can define info of security you have applied while creating your REST API such as Token, Client Key, etc...
- Global Security: Specify which security schemes are used in global
- Contact: Given name, email, URL, and Terms of Server regarding your REST API in case users wanted to contact (Optional, leave it blank if you don't need it)
- License: info of your REST API (Optional, leave it blank if you don't need it)

- Now, you can begin to document each endpoint of your API.
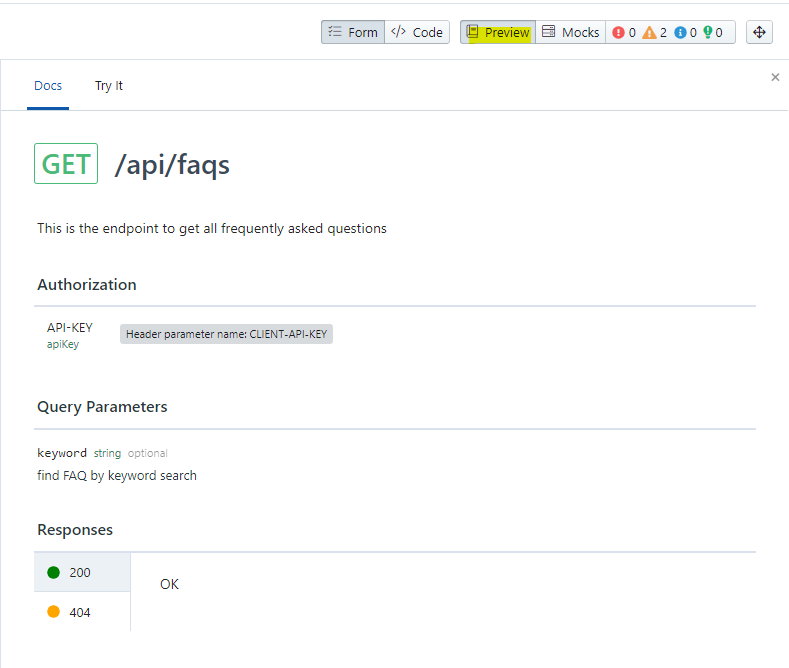
- Right-click on Paths and input your endpoint (/api/faqs)

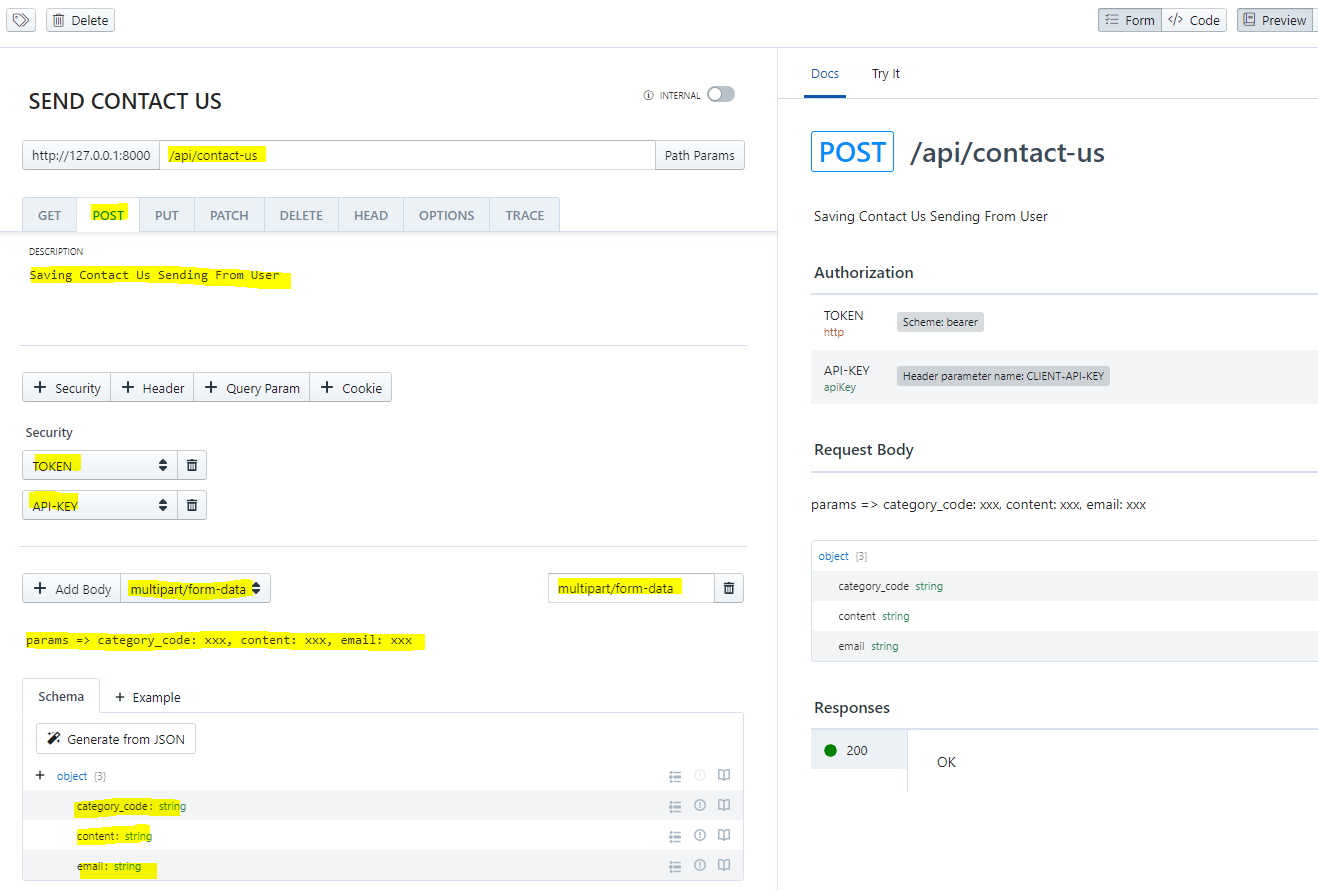
- Section 1: Choose your HTTP request (GET, POST, PUT, PATCH, DELETE, HEAD, OPTIONS, TRACE), and input the description of your endpoint. If you have path params, you can also define them here.

- Section 2: Choose your security, header, query param, or cookie if you have.

- Section 3: Add Body of you endpoint (this is mostly used in POST HTTP request)

- Section 4: Define your response body based on each HTTP code that your endpoint is expected to generate to client calls.

- In the right panel, you can see the preview of your defined endpoint document.
- NOW LET'S DEFINE ANOTHER NEW POST ENDPOINT /api/contact-us
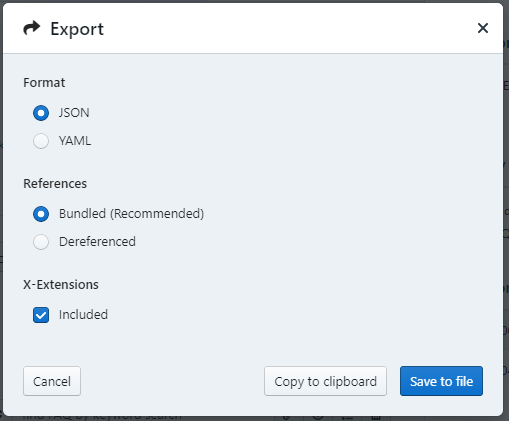
STEP 3: Export JSON
You can export the documented REST API in a JSON file format in order to share, keep, or whatever you want by following a simple. Right-click on JSON file and click the button export

Save JSON file to any location in your PC
STEP 4: Swagger-UI Integration
Now you have document REST API with the OpenAPI specification using Stoplight Studio, but how do you visualize that file so other developers can us it? The Swagger UI can help rendering your exported JSON file into a super nice UI for other developers to interact with.
- Create a new HTML file and paste the code below
<link rel="stylesheet" href="https://unpkg.com/swagger-ui-dist@latest/swagger-ui.css">
<script src="https://unpkg.com/swagger-ui-dist@latest/swagger-ui-bundle.js"></script>

<div id="swagger-ui"></div>

<script>
    window.onload = function () {
        window.ui = SwaggerUIBundle({
            url: 'url-to-your-openapi-json-file',
            dom_id: '#swagger-ui',
            deepLinking: true,
            presets: [
                SwaggerUIBundle.presets.apis,
            ],
            layout: 'BaseLayout',
        });
    };
</script>
- Now let's view your API integrated with Swagger UI in the web browser

THANK YOU !!!!
Find Us @
Facebook
Telegram
Twitter
LinkedIn
About author

SETHA THAY
Software Engineer & Project Manager. I am willing to share IT knowledge, technical experiences and investment to financial freedom. Feel free to ask and contact me.
You may also like