The practical SEO rules to apply to your website for further optimization
Experiment on website built with laravel 7
SEO (Search Engine Optimization) is a process of improving your site to increase visibility for relevant searches. As you may already hear about the term SEO which is used wisely when people talking about making their site popular or trends. Usually, the more your website shows when visitors search in google is better right? Yes, correct. This will bring your website more traffic, audience, and income.
There are some advantages when you apply SEO to your website such as increasing traffic by creating informative and keyword-relevant title tags and meta descriptions, which show up in the result pages, providing trackable and quantifiable results for website owners to have an insight of what going on. As you know SEO also ruled by Google therefore as long as you play along with the rule set up by Google, your website will stay up to date and relevant in Google search results.
In this post, I would like to introduce few basic steps you need to take action right before the production deployment of your website. These tips will be a good kick start of your website journey with SEO but it does not stop there. You can apply further optimization based on guidelines from Google for much better ranking experiences.
You can check these awesome books for your further optimization:
Step 1: Register your domain to google search console
Google Search Console is a web service by Google which allows webmasters (website owner) to check indexing status and optimize the visibility of their websites.
Google Search Console is a free tool from Google that helps developers, website owners, and SEO professionals understand how their site is performing on Google Search Engine.
- Visit Google Search Console enter your domain name and click continue
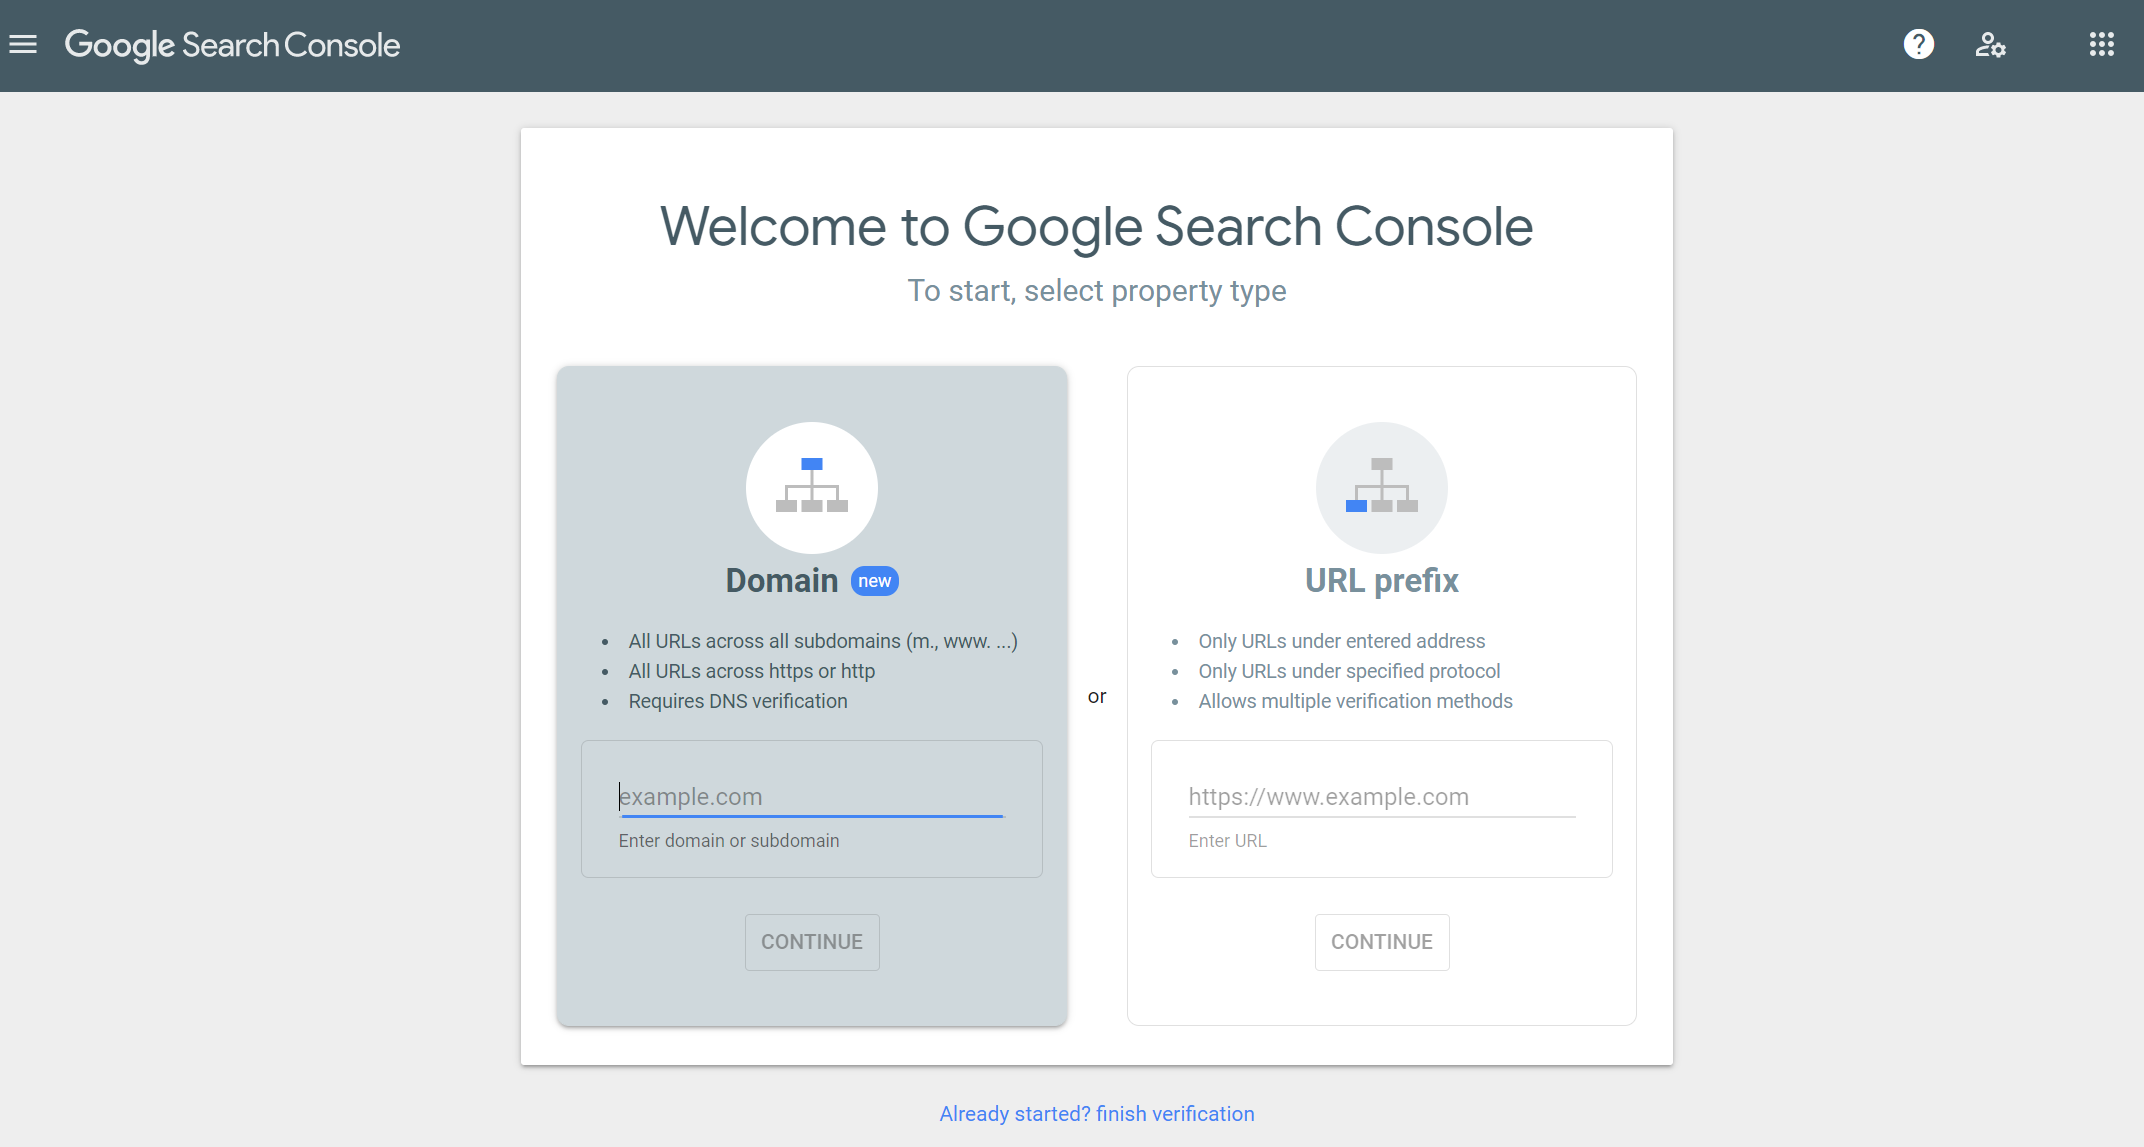
- Verify domain ownership via DNS record (My domain is bought using Godaddy) Yours might be different.
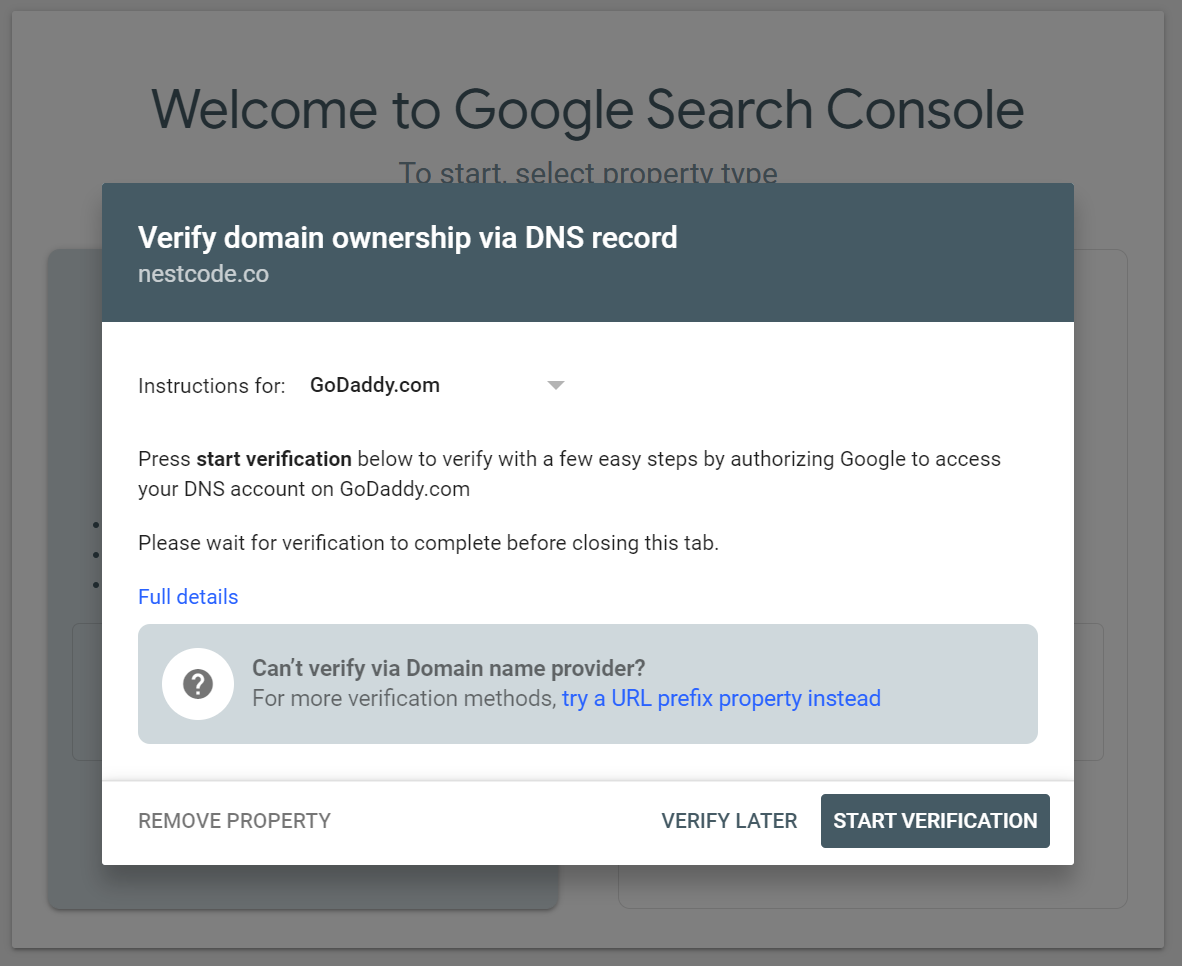
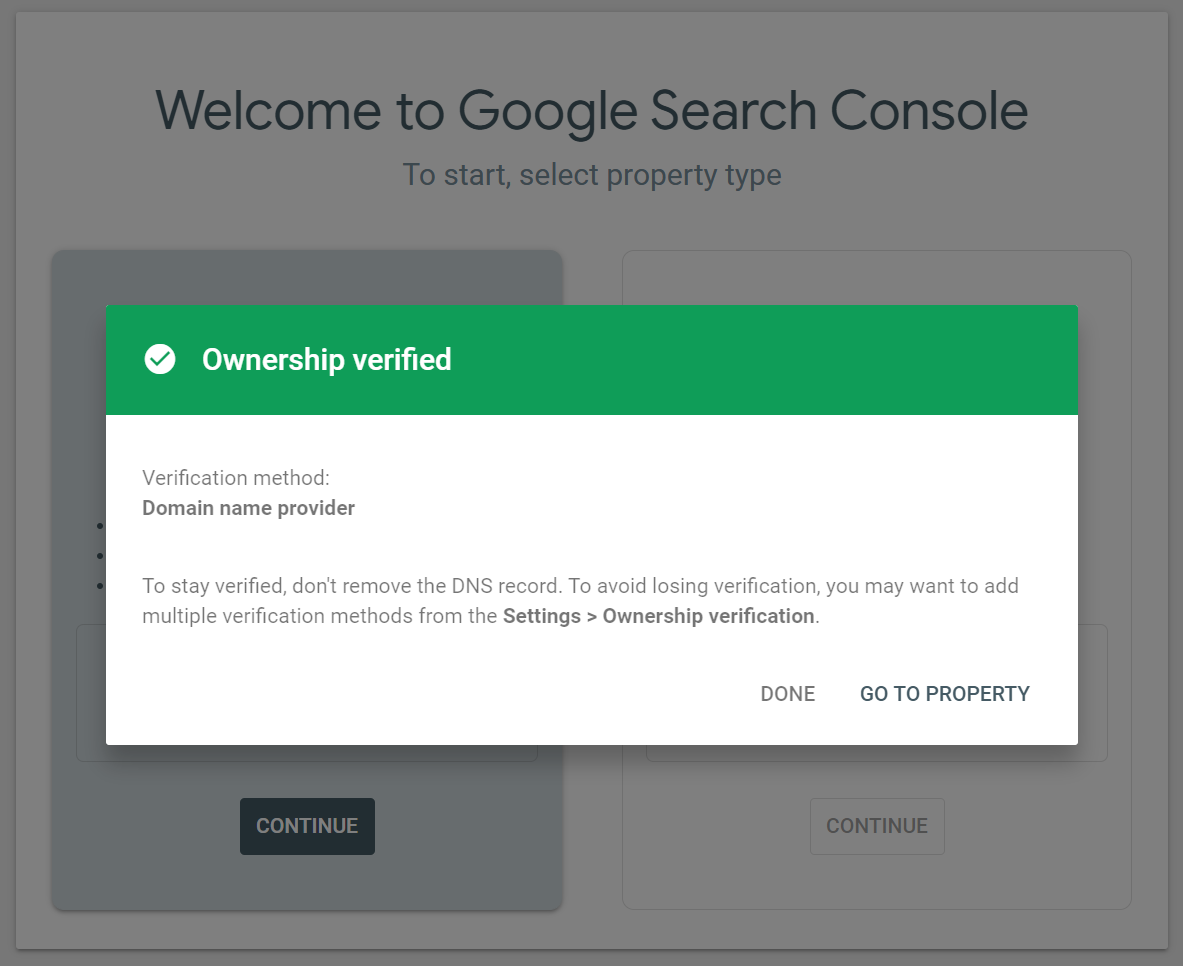
- Click start verification to process verify domain township via DNS record
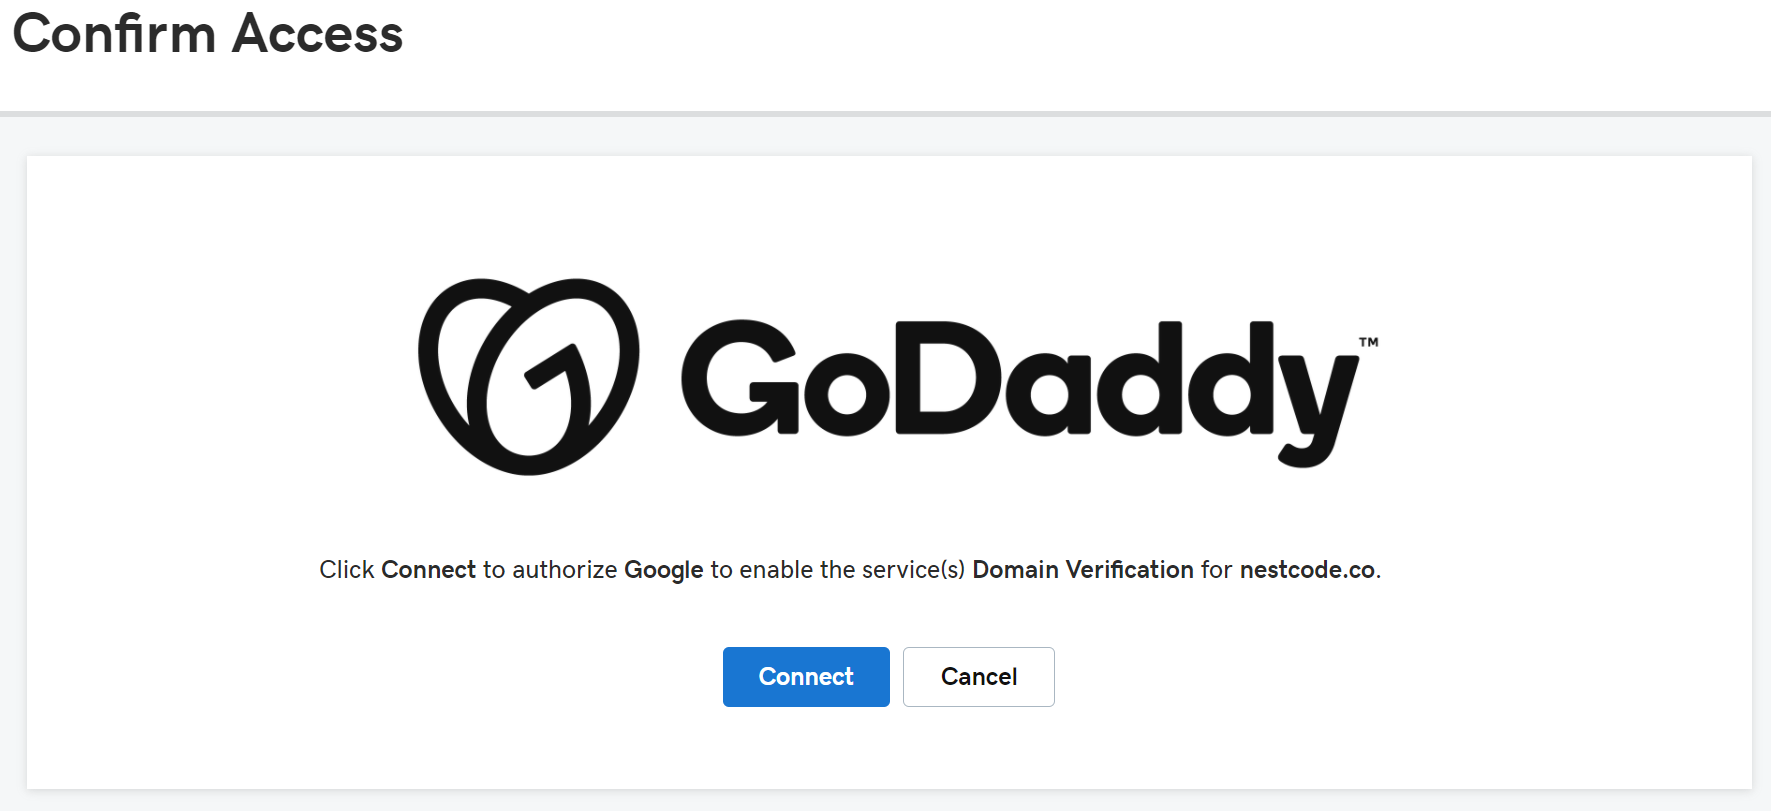
- Click connect and you are ready for the google search console
 Getting your google-site-verification code in DNS management Godaddy and put in tag header of your HTML page
<!doctype html>
<html lang="en">
<head>
<meta name="google-site-verification" content="your_google_site_verfication_code_put_here" />
</head>
Step 2: Register your domain to google analytics
Google Analytics is a web analytics service offered by Google that tracks and reports website traffic. it enables us to better understand our customers. You can then use those business insights to take action as necessary.
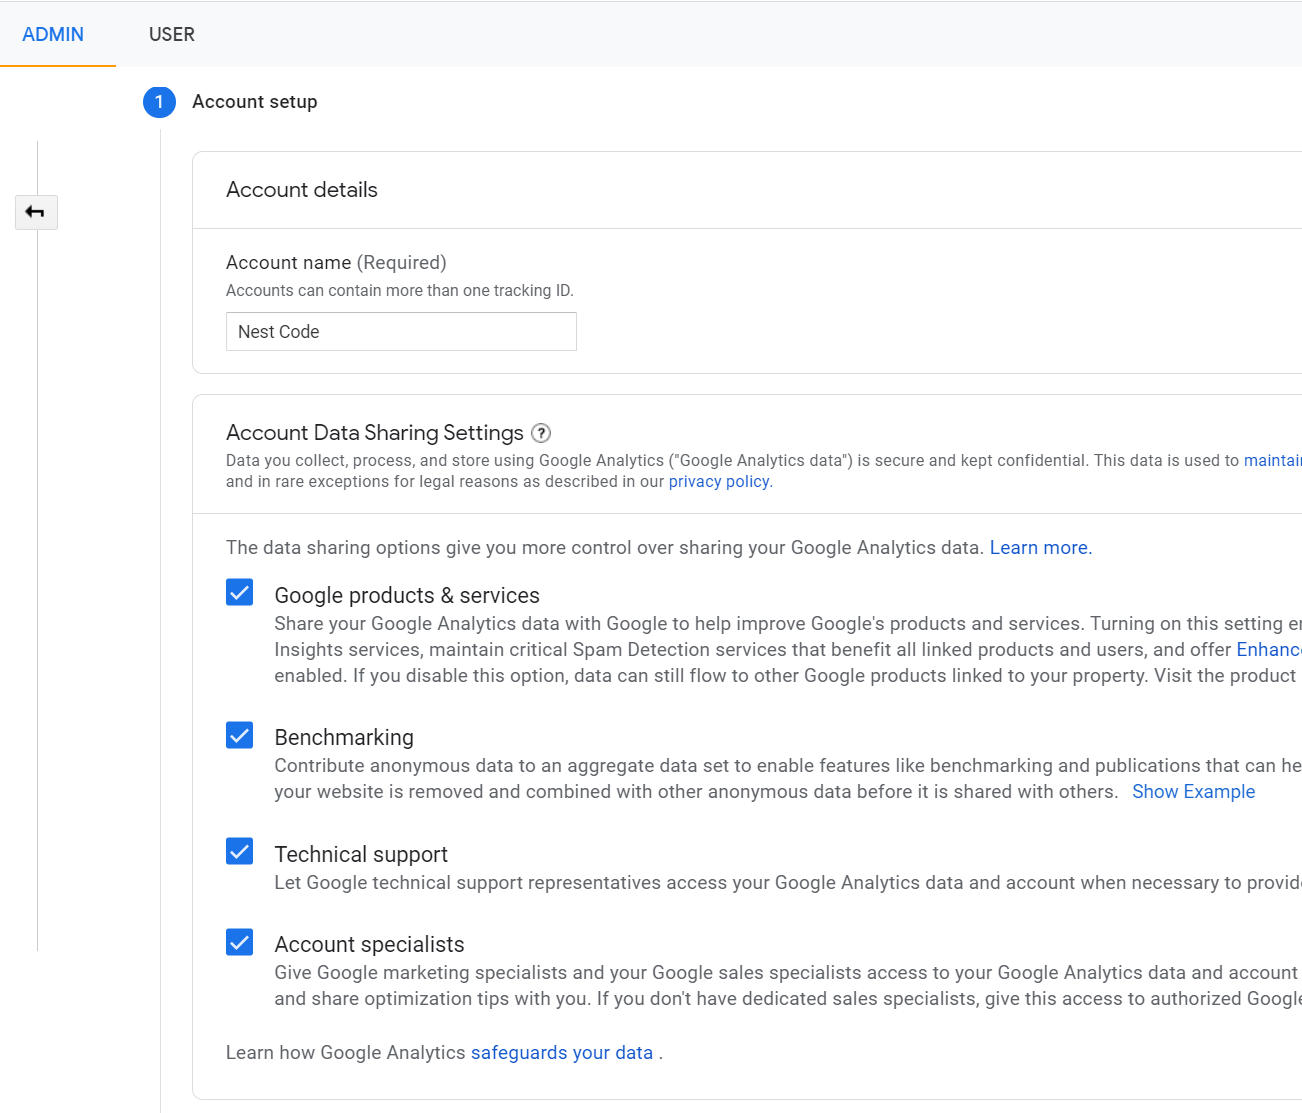
- Visit Google Analytics then click on menu "Admin" then click on add new account
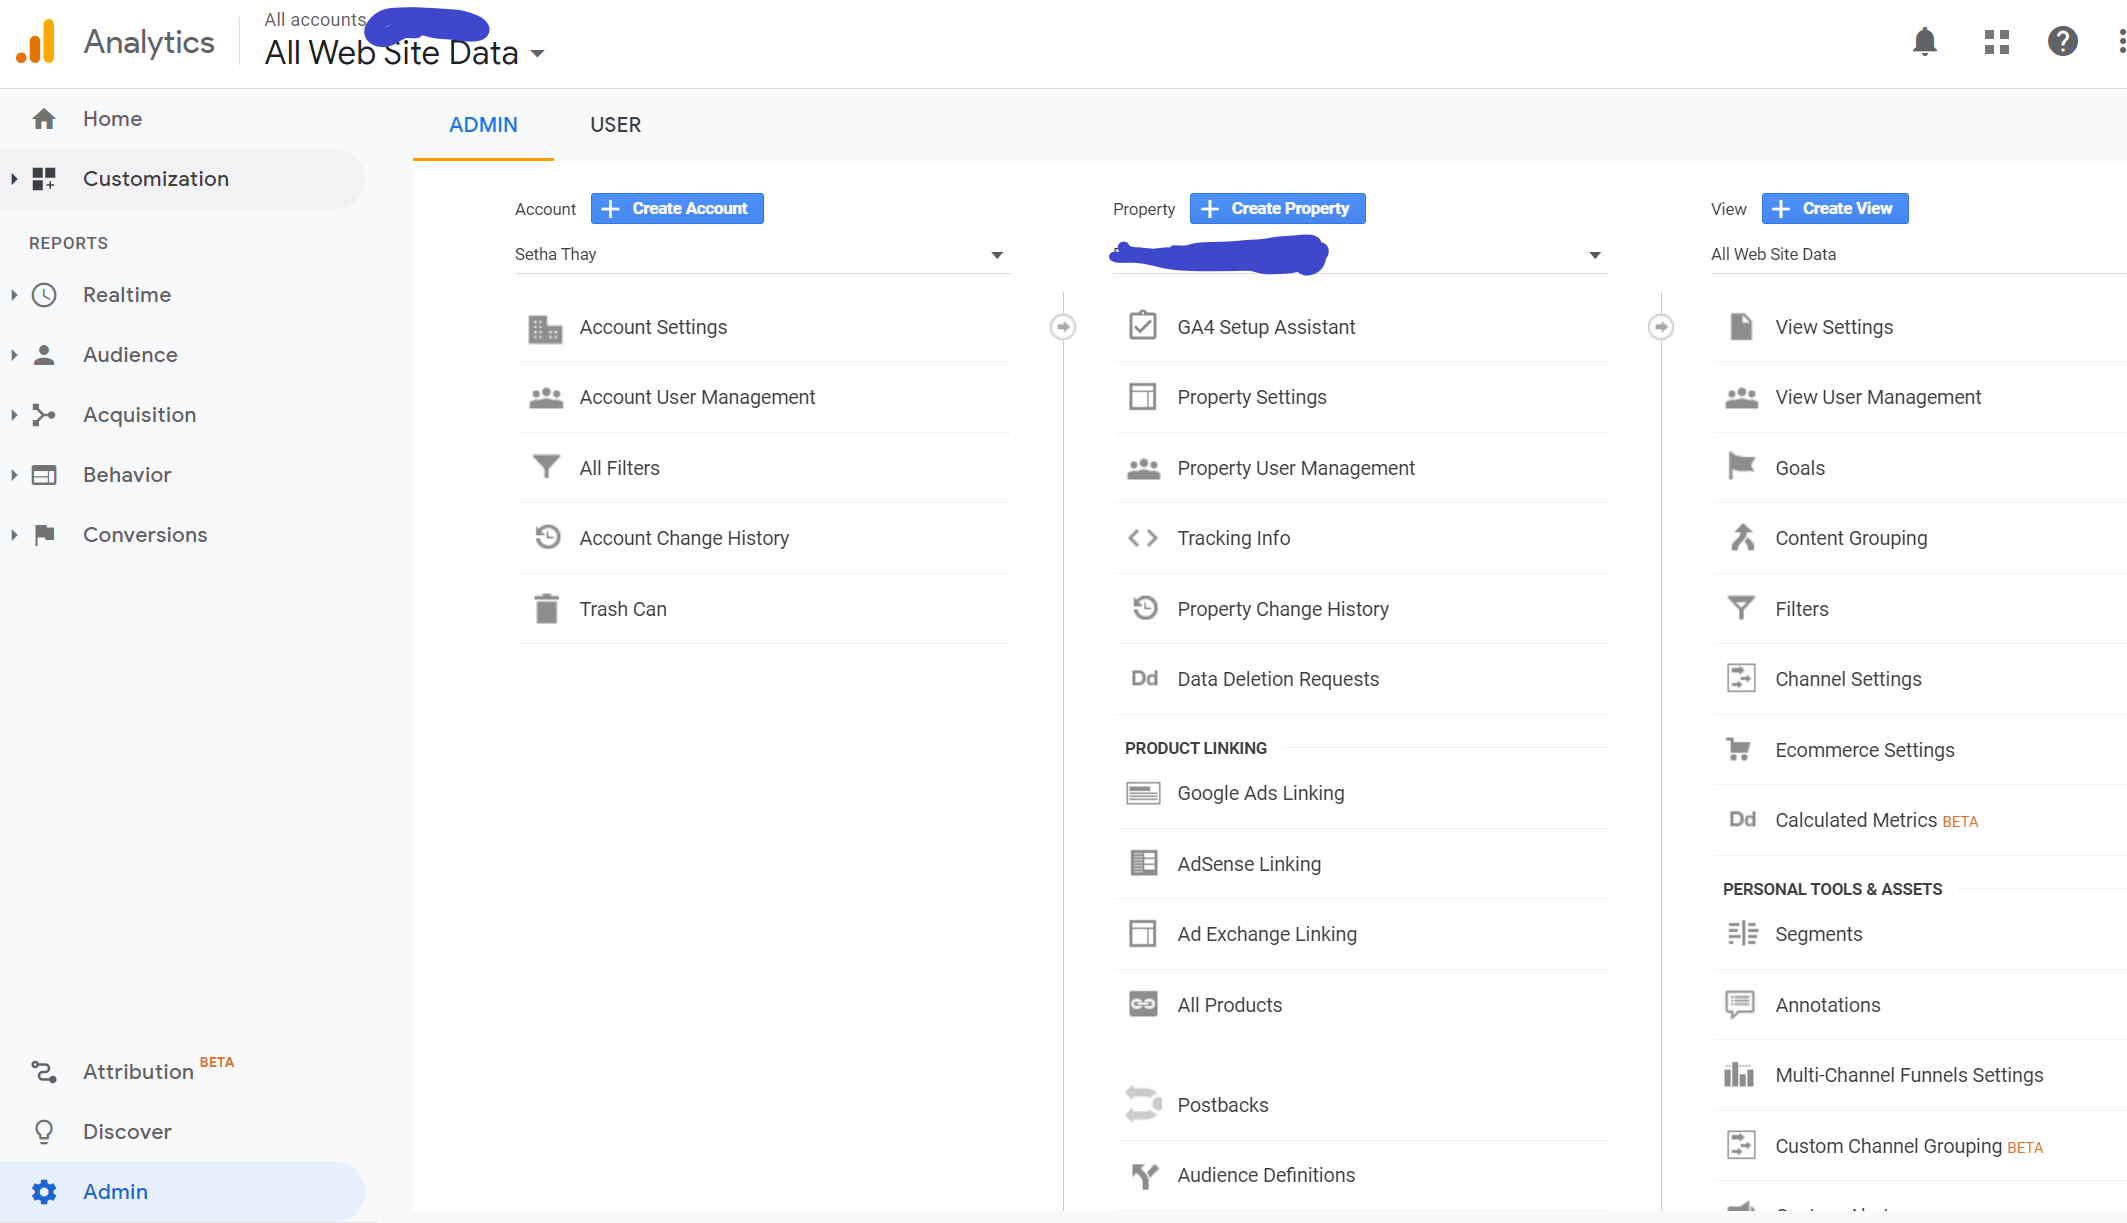
- Fill in the account name and check all the options
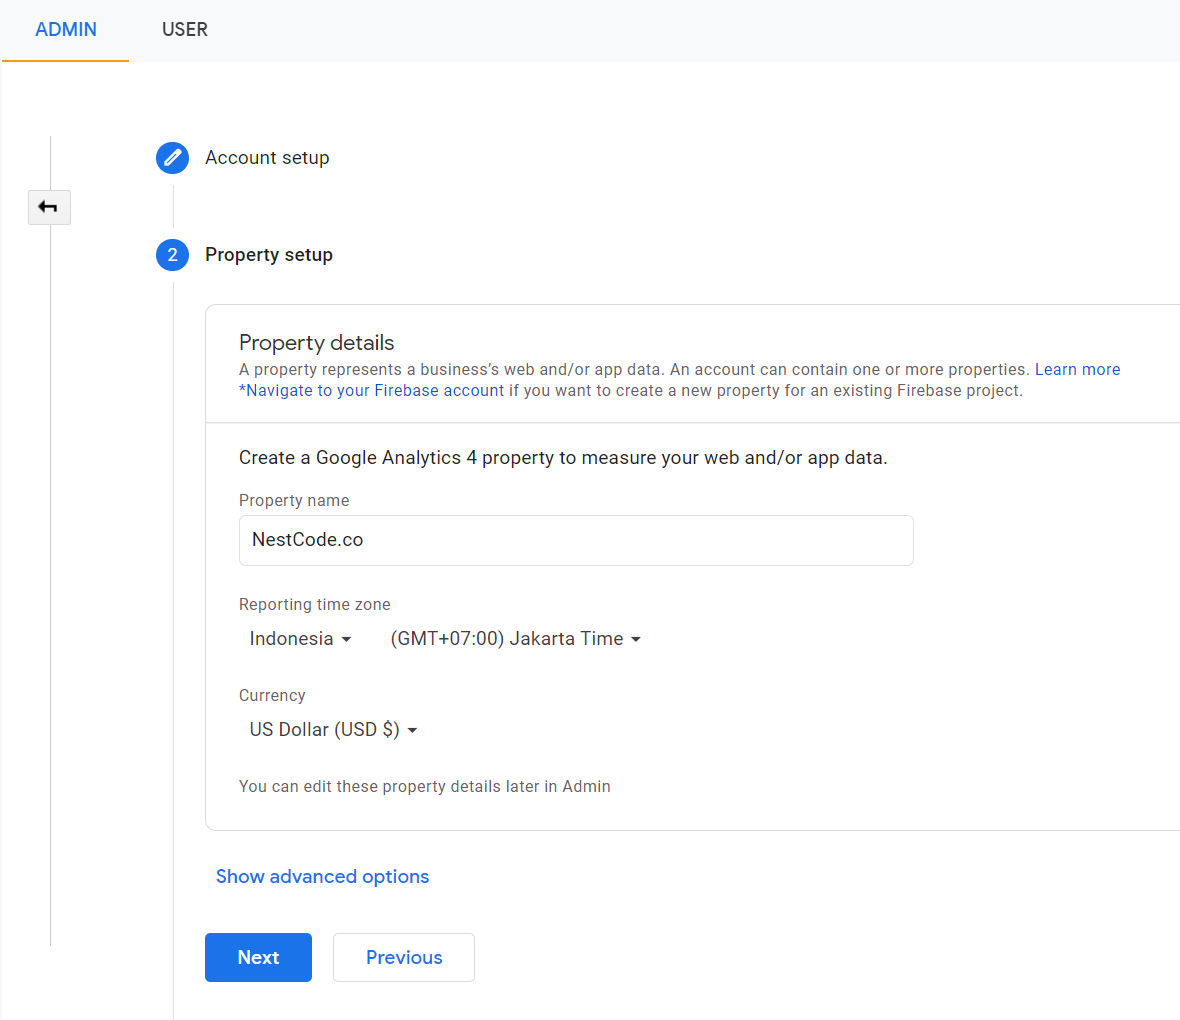
- Add new property of the account
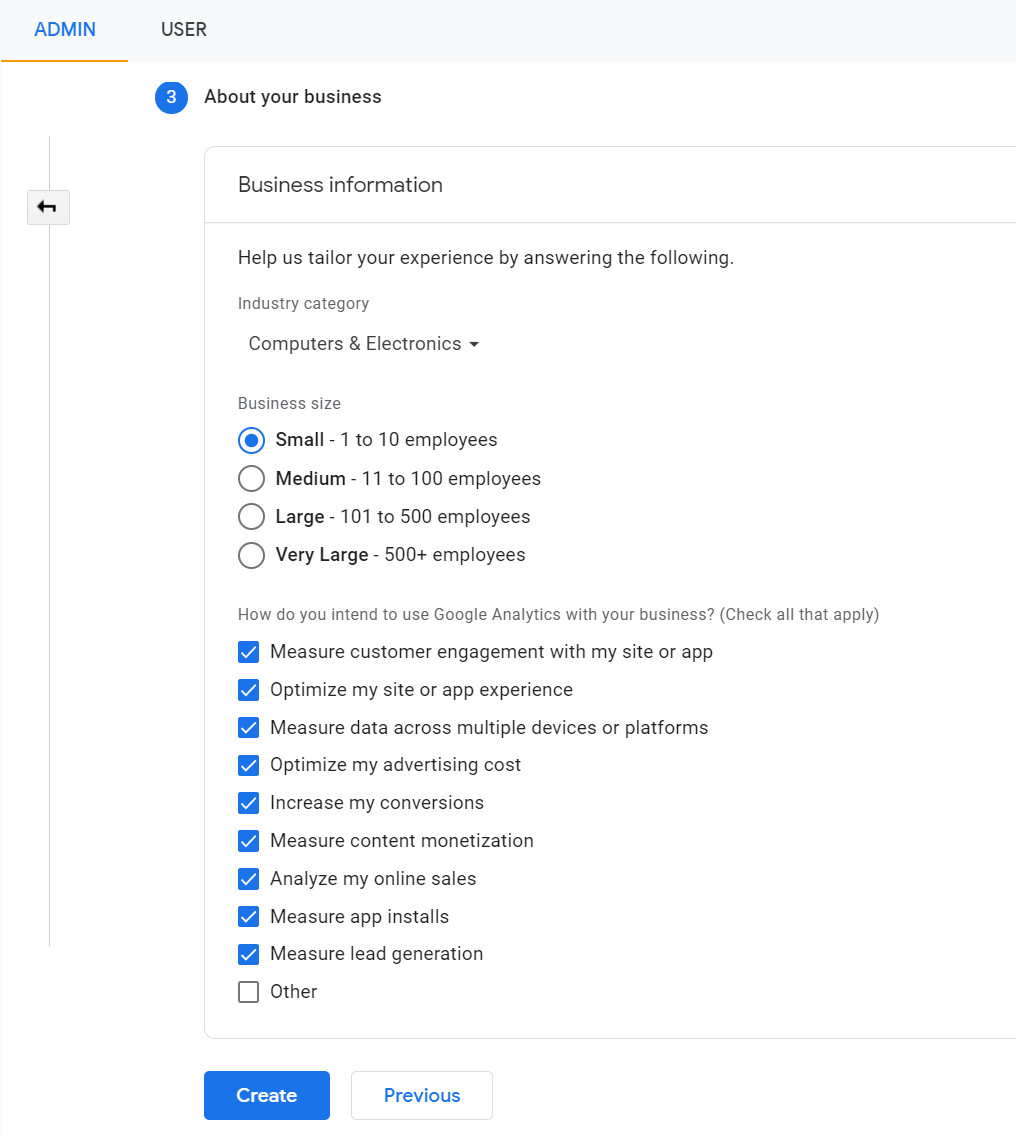
- Describe your business, and then click create and accept terms and condition of google analytics
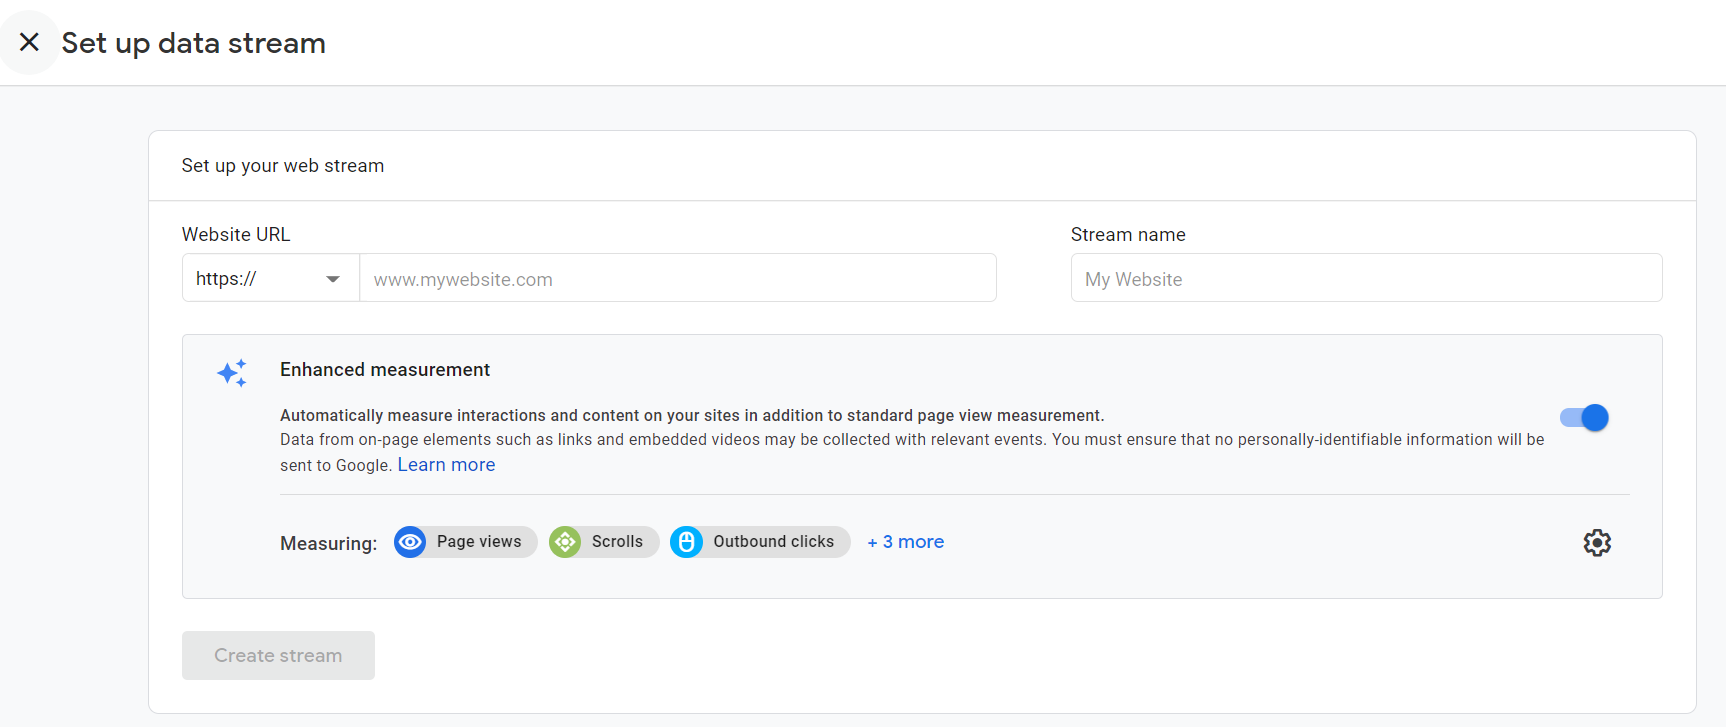
- Next step, you have to create a data stream by clicking on the button web
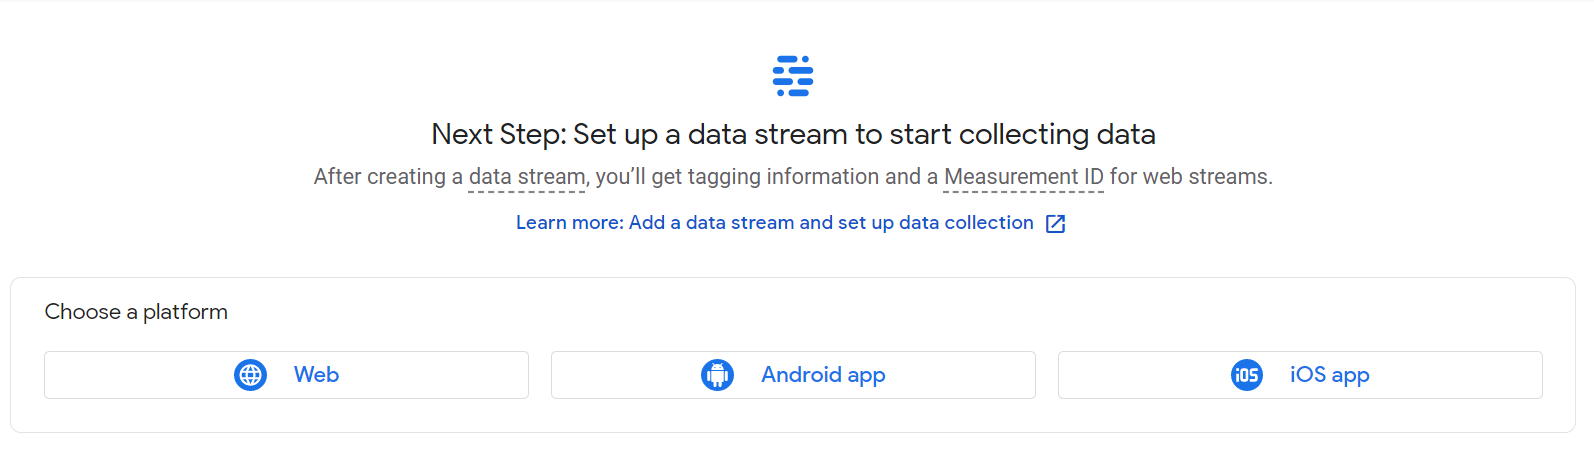
- Set up your data stream by input your website and stream name
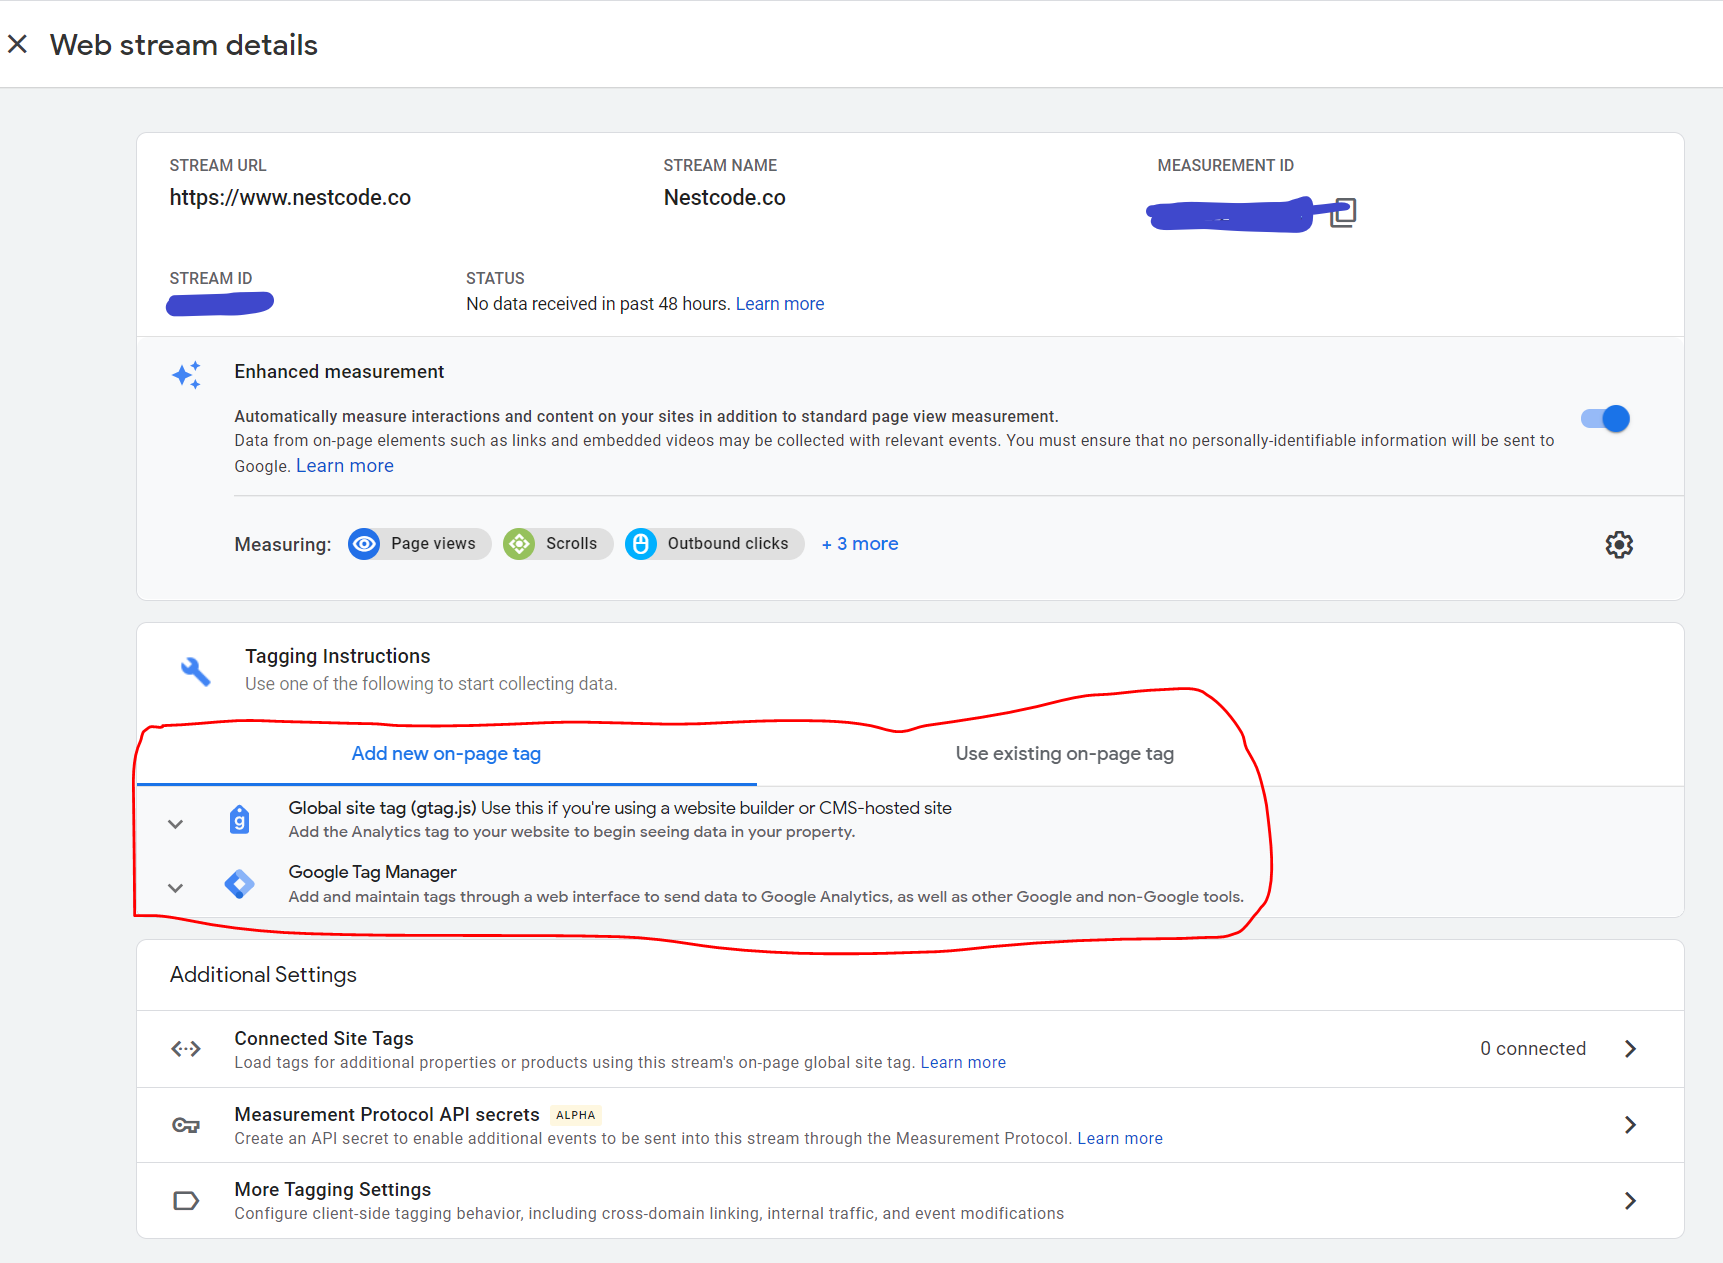
- Your webstream credential has been set up, now you can copy the google analytics snippet code to insert into the head tag of your site.
<!doctype html>
<html lang="en">
<head>
<!-- Global site tag (gtag.js) - Google Analytics -->
<script async src="https://www.googletagmanager.com/gtag/js?id=your_measurement_id"></script>
<script>
  window.dataLayer = window.dataLayer || [];
  function gtag(){dataLayer.push(arguments);}
  gtag('js', new Date());

  gtag('config', 'your_measurement_id');
</script>
</head>
Step 3: Ensure you have lang attribute with your HTML tag
<html lang="en">
Step 4: Describe each of your pages with title tag
<title>
Nest Code - The knowledge hub of technology, coding tips,and the valuable platform for IT skill sharing
</title>
Step 5: Adding metadata for your site
<meta name="viewport" content="width=device-width, initial-scale=1, shrink-to-fit=no">
<meta charset="utf-8">
<meta http-equiv="X-UA-Compatible" content="IE=edge">
<meta name="description" content="Aims to be the knowledge hub of technology, coding tips, and a valuable platform for IT skill sharing">
<meta name="keywords" content="Nest Code, Sambok Code, Tech News in Cambodia, Technology News in Cambodia">
<meta name="author" content="Nest Code">
Step 6: Adding canonical link to each page of your site
<link rel="canonical" href="https://www.nestcode.co/en/blog">
<link rel="canonical" href="https://www.nestcode.co/en/blog/sql-script-to-get-table-structure-info-without-using-tools">
.
.
etc ...
Step 7: Each page of your site must have H1 and should have one of this H2, H3, or H4
<h1> title of h1 </h1>
<h2> title of h2 </h2>
<h3> title of h3 </h3>
<h4> title of h4 </h4>
Step 8: All images tag must-have attribute alt
<img src="https://nestcode.co/blog_images/sql-script-to-get-table-structure-info-without-using-tools-1000x700.png" alt="SQL script to get table structure info without using tools" class="img-fluid">
Step 9: Make sure all your social links are available
<div class="social">
<a href="{{env('fb')}}" target="_blank" data-toggle="tooltip" data-placement="bottom" title="Facebook"><i class="fa fa-facebook"></i></a>
<a href="{{env('twitter')}}" target="_blank" data-toggle="tooltip" data-placement="bottom" title="Twitter"><i class="fa fa-twitter"></i></a>
<a href="{{env('linkedin')}}" target="_blank" data-toggle="tooltip" data-placement="bottom" title="Linkedin"><i class="fa fa-linkedin"></i></a>
<a href="{{env('telegram')}}" target="_blank" data-toggle="tooltip" data-placement="bottom" title="Telegram"><i class="fa fa-telegram"></i></a>
</div>
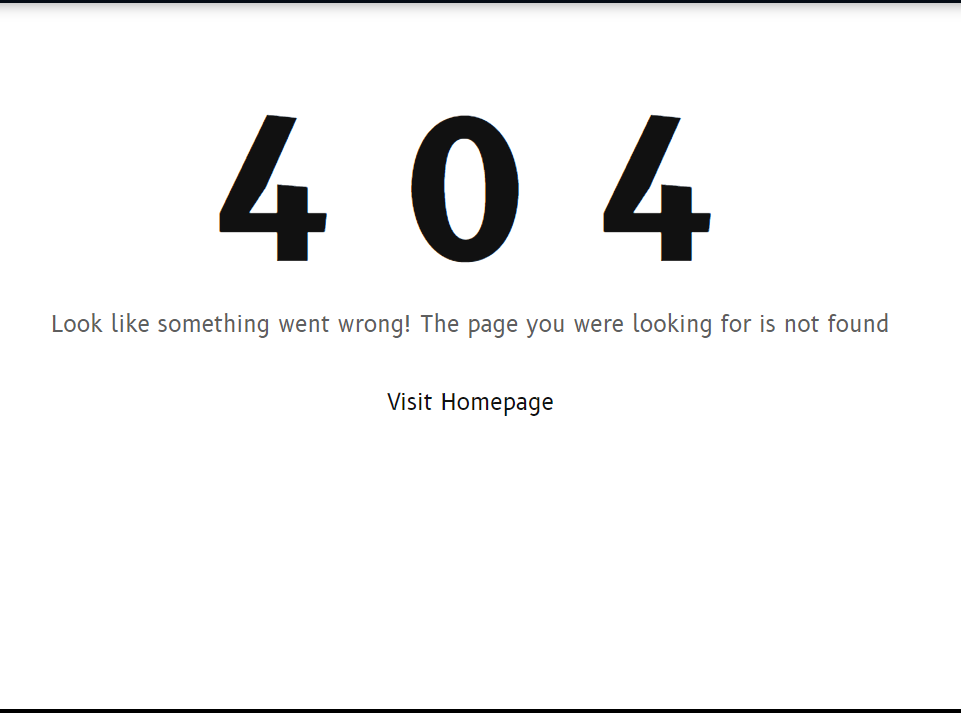
Step 10: Handling error page 404 properly
This page is displayed when the user trying to type the wrong URL on your website.
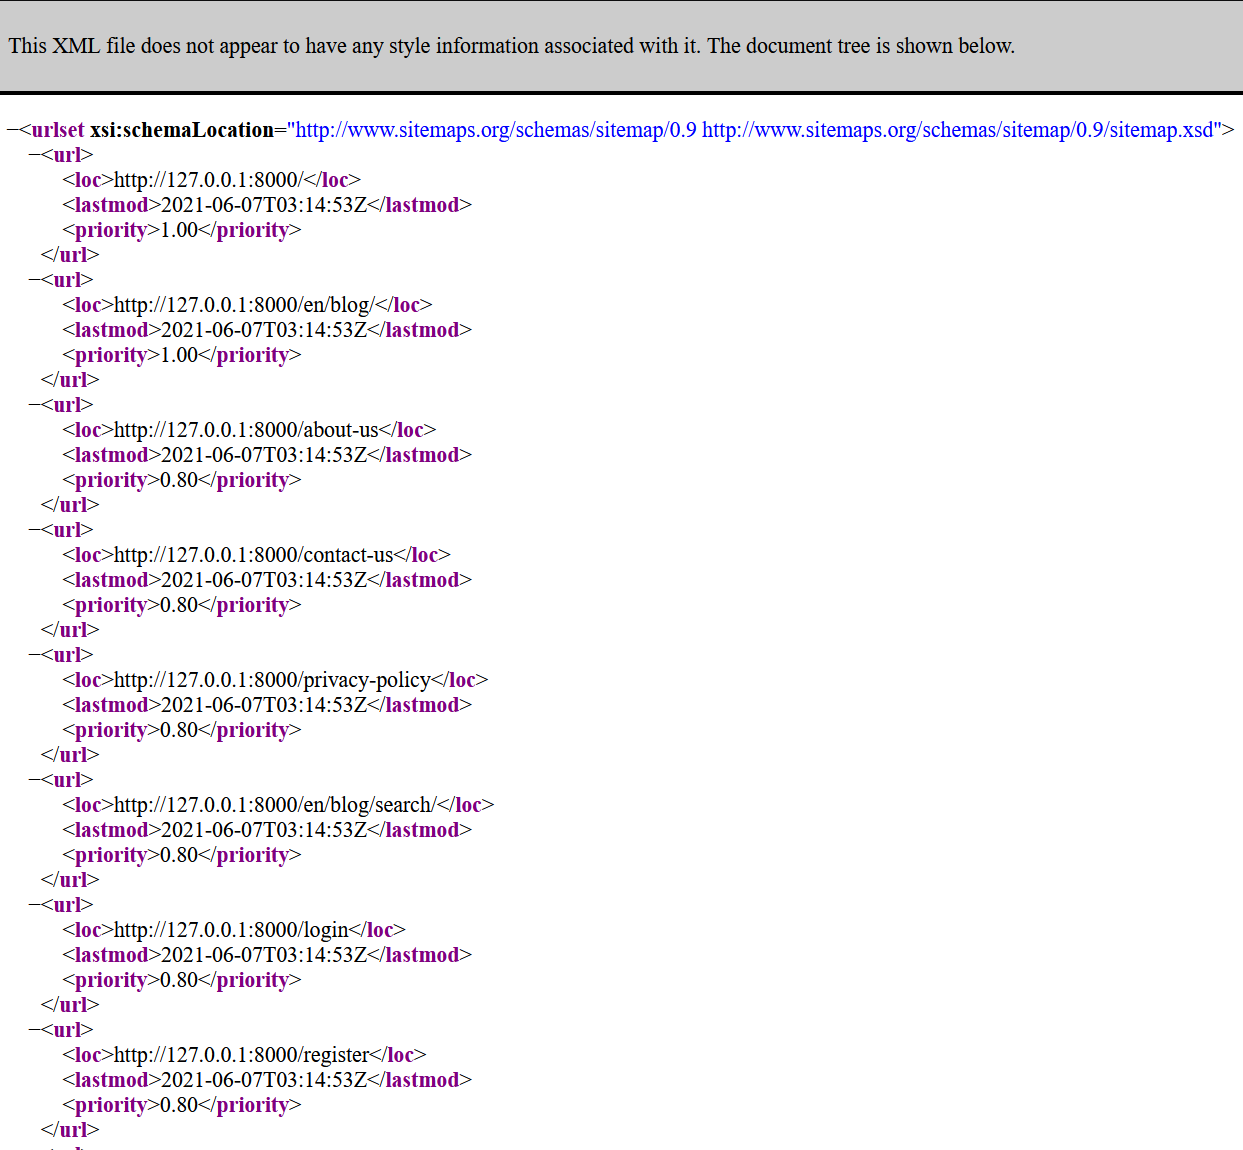
Step 11: Sitemap
Step 12: robots.txt
Allow google crawler to check on your website content, usually, you should put it in the root directory of your site.
User-agent: *
Disallow:
Finally, you have to test your website with mobile-friendliness using this link and test the speed performance of your website using this link which result should be above 70%
This is a long post but I hope you enjoy it.
THANK YOU, Find Us @
Facebook
Telegram
Twitter
LinkedIn
About author

SETHA THAY
Software Engineer & Project Manager. I am willing to share IT knowledge, technical experiences and investment to financial freedom. Feel free to ask and contact me.
You may also like