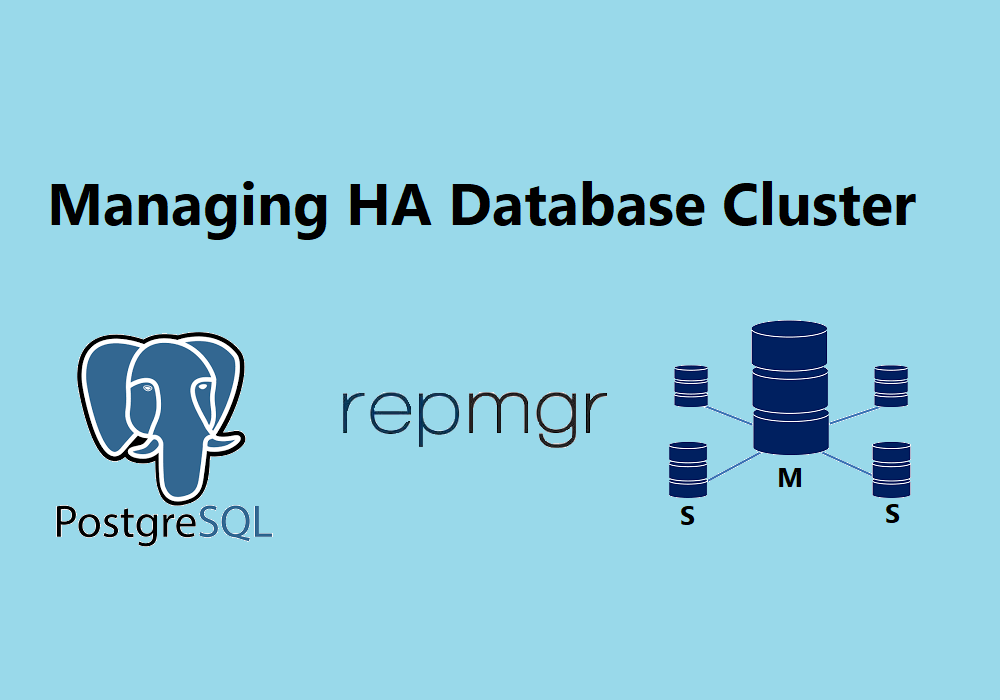
Managing High Availability Database Cluster with Repmgr (PostgreSQL 13 and Repmgr 5.2)
Experiment with 3 Postgresql Data Clusters on the Same Server

In a previous post, I shared how to install PostgreSQL 13 on Ubuntu 20.4 which you will get a workable data cluster instance of PostgreSQL. In the real world, the databases will be managing in an architecture that takes consideration of high availability so that your business can be operated 24/7 without worrying about downtime or data loss. There are two popular approaches usually use, master-slave and multi-master databases. The term "High Availability" is the ability of databases server to operate continuously without any problem or can recover as quickly as possible in case of interruption or downtime. In this post, we are going to implement the master and slaves approach by using repmgr as a tool to manage the cluster.
Repmgr is a product of 2ndQuadrant for managing replication and failover in a cluster of PostgreSQL servers. Repmgr provides built-in hot-standby capabilities with tools to set up standby servers, monitor replication, perform administrative tasks such as failover or manual switchover operations.
In this experiment, we are using only one database server which running 3 instances of PostgreSQL in different ports. Master is running localhost port 5432, Slave or standby 1 will be run in localhost port 5433, and standby 2 runs in localhost port 5434. In practice, you should have 3 different database servers which running 3 different PostgreSQL instances so that when one server is down you can switch over to use the other two running database servers.
OK, LET'S START...
STEP 1: Prepare Directory for Slave 1 and 2
- Create a folder to store data cluster instances which we will create later using repmgr cloning
sudo mkdir /data02
sudo chown postgres:dba /data02

sudo mkdir /data03
sudo chown postgres:dba /data03

- you can check your current running PostgreSQL instance using the below command
ps -eaf|grep postgres

Master Slaves Architecture Figure

STEP 2: Prerequisite before Setup Repmgr 5.2
Before you install repmgr 5.2 from the source, you have to config the parameter setting in PostgreSQL for cluster compatibility. This is the configuration of Master (host: localhost port: 5432 data directory: /data01)
//In the real world, the addresses should be the IP addresses of 3 database servers, but
//our testing scenario we use only one server which is localhost

listen_addresses = 'localhost'
max_wal_senders = 10
max_replication_slots = 10
wal_level = 'logical'
hot_standby = on
archive_mode = on
archive_command = 'cp -i %p /reco/%f'

//postgresql 12, using param wal_keep_segments but postgesql 13 wal_keep_size
wal_keep_size = 4000
wal_log_hints = on
//these above two params is used for pg_rewind when doing rejoin operation


//Reference1: https://repmgr.org/docs/5.0/quickstart-postgresql-configuration.html
//Reference2: https://repmgr.org/docs/5.0/configuration-prerequisites.html
STEP 3: Installing Repmgr 5.2
- Download source repmgr from official website
wget https://repmgr.org/download/repmgr-5.2.0.tar.gz

tar -zxvf repmgr-5.2.0.tar.gz
- Set path of repmgr to user Postgres base profile
//Set path bash_profile of user postgres:
export PG_CONFIG=/app/postgres/product/13.3/db_1/bin/pg_config
source ~/.profile
- Installing repmgr
./configure && make install

//if error flex: Command not found, please set up flex as below command
//sudo apt install flex
- Prepare repmgr config file
sudo mkdir -p /app/repmgr/5.2/
sudo chown postgres:dba /app/repmgr/5.2/
cp /backup/repmgr-5.2.0/repmgr.conf.sample  /app/repmgr/5.2/repmgr.conf.sample
mv /app/repmgr/5.2/repmgr.conf.sample /app/repmgr/5.2/repmgr1.conf
//The repmgr1.conf is used for Master

cp /backup/repmgr-5.2.0/repmgr.conf.sample  /app/repmgr/5.2/repmgr.conf.sample
mv /app/repmgr/5.2/repmgr.conf.sample /app/repmgr/5.2/repmgr2.conf
//The repmgr2.conf is used for Slave 1

cp /backup/repmgr-5.2.0/repmgr.conf.sample  /app/repmgr/5.2/repmgr.conf.sample
mv /app/repmgr/5.2/repmgr.conf.sample /app/repmgr/5.2/repmgr3.conf
//The repmgr2.conf is used for Slave 2
The above commands will get you 3 repmgr config files for the Master, Standby 1 and 2

- Create repmgr superuser and verify repmgr integration extension with PostgreSQL
//login as postgres user
createuser --superuser repmgr
createdb --owner=repmgr repmgr
psql -c "ALTER USER repmgr SET search_path TO repmgr, public;"

//Add in postgresql.conf then restart postgresql service
shared_preload_libraries = 'repmgr'

sudo systemctl restart postgresql

//To verify repmgr extension
psql -c "select * from pg_available_extensions where name = 'repmgr';"

STEP 4: Configure Master (host: localhost port: 5432)
- Edit repmgr config file for master data cluster
vi /app/repmgr/5.2/repmgr1.conf
node_id=1
node_name='master-db'
conninfo='host=localhost port=5432 user=repmgr dbname=repmgr connect_timeout=2'
data_directory='/data01'
pg_bindir='/app/postgres/product/13.3/db_1/bin/'
service_start_command = 'sudo systemctl start postgresql'
service_stop_command = 'sudo systemctl stop postgresql'
service_restart_command = 'sudo systemctl restart postgresql'
service_reload_command = 'sudo systemctl reload postgresql'
//Need to allow sudo visudo to start/stop/restart/reload

//if using auto failover you have to configure repmgrd
//repmgrd_service_start_command = '/app/postgres/product/13.3/db_1/bin/repmgrd -f /app/repmgr/5.2/repmgr1.conf'
//repmgrd_service_stop_command = 'kill `cat /tmp/repmgrd.pid`'

//in case of using custom SSH port
//ssh_options='-p52252 -q -o ConnectTimeout=10'
- Configure PostgreSQL replication security in pg_hba.conf
vi /data01/pg_hba.conf
local replication repmgr  trust
host replication repmgr 127.0.0.1/32 trust
//host replication repmgr ip_master/32 trust
//host replication repmgr ip_standby1/32 trust
//host replication repmgr ip_standby2/32 trust
local repmgr repmgr  trust
host repmgr repmgr 127.0.0.1/32 trust
//host repmgr repmgr ip_master/32 trust
//host repmgr repmgr ip_standby1/32 trust
//host repmgr repmgr ip_standby2/32 trust
- Register Master into repmgr cluster
//Register primary into repmgr cluster
/app/postgres/product/13.3/db_1/bin/repmgr -f /app/repmgr/5.2/repmgr1.conf primary register --dry-run
/app/postgres/product/13.3/db_1/bin/repmgr -f /app/repmgr/5.2/repmgr1.conf primary register

//Check status of repmgr cluster
/app/postgres/product/13.3/db_1/bin/repmgr -f /app/repmgr/5.2/repmgr1.conf cluster show --compact

STEP 5: Configure Standby 1 (host: localhost port: 5433)
- Edit repmgr config file for standby 1 data cluster
vi /app/repmgr/5.2/repmgr2.conf
node_id=2
node_name='standby1-db'
conninfo='host=localhost port=5433 user=repmgr dbname=repmgr connect_timeout=2'
data_directory='/data02'
pg_bindir='/app/postgres/product/13.3/db_1/bin/'
service_start_command = '/app/postgres/product/13.3/db_1/bin/pg_ctl -D /data02 -l logfile start'
service_stop_command = '/app/postgres/product/13.3/db_1/bin/pg_ctl -D /data02 -l logfile stop'
service_restart_command = '/app/postgres/product/13.3/db_1/bin/pg_ctl -D /data02 -l logfile restart'
service_reload_command = '/app/postgres/product/13.3/db_1/bin/pg_ctl -D /data02 -l logfile reload'
//Need to allow sudo visudo to start/stop/restart/reload

//if using auto failover you have to configure repmgrd
//repmgrd_service_start_command = '/app/postgres/product/13.3/db_1/bin/repmgrd -f /app/repmgr/5.2/repmgr2.conf'
//repmgrd_service_stop_command = 'kill `cat /tmp/repmgrd.pid`'

//in case of using custom SSH port
//ssh_options='-p52252 -q -o ConnectTimeout=10'
- Clone standby 1 from master and register it into repmgr cluster
//Cloning the Standby Nodes
/app/postgres/product/13.3/db_1/bin/repmgr  -h localhost -p5432 -U repmgr -d repmgr -f /app/repmgr/5.2/repmgr2.conf standby clone --dry-run
/app/postgres/product/13.3/db_1/bin/repmgr  -h localhost -p5432 -U repmgr -d repmgr -f /app/repmgr/5.2/repmgr2.conf standby clone

//Start postgresql instance of standby 1
//change port in postgresql.conf to 5433
/app/postgres/product/13.3/db_1/bin/pg_ctl -D /data02 -l logfile start

//Register standby1 into repmgr cluster
/app/postgres/product/13.3/db_1/bin/repmgr -f /app/repmgr/5.2/repmgr2.conf standby register --dry-run
/app/postgres/product/13.3/db_1/bin/repmgr -f /app/repmgr/5.2/repmgr2.conf standby register

//Check status of repmgr cluster
/app/postgres/product/13.3/db_1/bin/repmgr -f /app/repmgr/5.2/repmgr2.conf cluster show --compact

STEP 6: Configure Standby 2 (host: localhost port: 5434)
- Edit repmgr config file for standby 2 data cluster
vi /app/repmgr/5.2/repmgr3.conf
node_id=3
node_name='standby2-db'
conninfo='host=localhost port=5434 user=repmgr dbname=repmgr connect_timeout=2'
data_directory='/data03'
pg_bindir='/app/postgres/product/13.3/db_1/bin/'
service_start_command = '/app/postgres/product/13.3/db_1/bin/pg_ctl -D /data03 -l logfile start'
service_stop_command = '/app/postgres/product/13.3/db_1/bin/pg_ctl -D /data03 -l logfile stop'
service_restart_command = '/app/postgres/product/13.3/db_1/bin/pg_ctl -D /data03 -l logfile restart'
service_reload_command = '/app/postgres/product/13.3/db_1/bin/pg_ctl -D /data03 -l logfile reload'
//Need to allow sudo visudo to start/stop/restart/reload

//if using auto failover you have to configure repmgrd
//repmgrd_service_start_command = '/app/postgres/product/13.3/db_1/bin/repmgrd -f /app/repmgr/5.2/repmgr3.conf'
//repmgrd_service_stop_command = 'kill `cat /tmp/repmgrd.pid`'

//in case of using custom SSH port
//ssh_options='-p52252 -q -o ConnectTimeout=10'
- Clone standby 2 from master and register it into repmgr cluster
//Cloning the Standby Nodes
/app/postgres/product/13.3/db_1/bin/repmgr  -h localhost -p5432 -U repmgr -d repmgr -f /app/repmgr/5.2/repmgr3.conf standby clone --dry-run
/app/postgres/product/13.3/db_1/bin/repmgr  -h localhost -p5432 -U repmgr -d repmgr -f /app/repmgr/5.2/repmgr3.conf standby clone

//Start postgresql instance of standby 1
//change port in postgresql.conf to 5434
/app/postgres/product/13.3/db_1/bin/pg_ctl -D /data03 -l logfile start

//Register standby1 into repmgr cluster
/app/postgres/product/13.3/db_1/bin/repmgr -f /app/repmgr/5.2/repmgr3.conf standby register --dry-run
/app/postgres/product/13.3/db_1/bin/repmgr -f /app/repmgr/5.2/repmgr3.conf standby register

//Check status of repmgr cluster
/app/postgres/product/13.3/db_1/bin/repmgr -f /app/repmgr/5.2/repmgr3.conf cluster show --compact

Conclusion
Now we have a repmgr cluster that manages three PostgreSQL instances, Master, Standby 1, and Standby 2. By adding servers or instances into the repmgr cluster, it is easy to perform tasks such as promote standby, switch over, auto-failover, and rejoin to any nodes inside the cluster. In the next post, we will introduce you to some of the tasks you can execute using the repmgr command.
STAY TUNE and THANK YOU!!!


