Using CKEditor to Input Your Content the Way You Want
CKEditor with upload files and code snippet plug-in installed
CKEditor is a very useful and one of the most useful rich text editors. It is different from the text input or text area by its variety of content input such as image insertion, emoji, link, video, etc. There are many kinds of editors such as summernote, tiny editor, etc but based on my personal experience CKEditor is one of the most powerful. It comes with a default configuration and allows you to add many available plug-ins as well. You can check their demo here https://ckeditor.com/ckeditor-4/demo/. In this post, we will show you an example of how you can use CKEditor with image upload and install a plug-in called CodeSnippet into the configuration of CKEditor 4 with the laravel application. We come up with this example while we develop the blog posts that we want to display the content of the post followed whatever written by the publisher and since our blog is about technology we want to show some code snippets to website visitors as well.
Step 1: Having your laravel application ready and download CKEditor 4 add it into your public folder
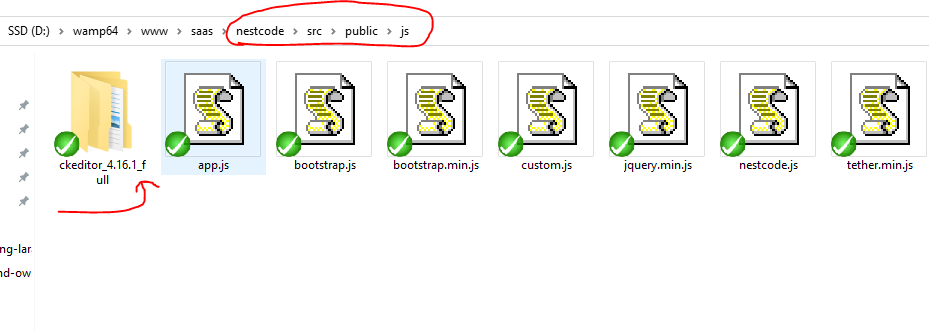
Download with full package version of CKEditor and do not use CDN because by using CDN you can't add additional plug-in as you want. As you can see in the below screenshot, we download full package version of CKEditor and put it inside the folder of our project nestcode/src/public/js
Step 2: Create route, controller, and view to show Editor
In this step, we will use blade view to design the form layout which contains CKEditor for inputting contents. First, we create HTML Textarea by defined ID, name, and some styling, and then by using the CKEditor package library we write a JS code snippet to convert HTML Textarea into CKEditor. Next, we create a function to enable the upload functionality of CKEditor (By default, you can't upload images). Finally, you will see the fully workable editor on your web browser.
- In blade view, let define a textarea and giving an ID and name
<textarea style='min-height:600px;' class="form-control" id="blog_post_body" aria-describedby="blog_post_body_help"
              name='post_body'>{{old("post_body",$post_translation->post_body)}}</textarea>
- Import ckeditor.js into your view and start to create a CKEditor object with the following JS code
<script src="{{asset('js/ckeditor_4.16.1_full/ckeditor/ckeditor.js')}}"></script>
    <script>
        if( typeof(CKEDITOR) !== "undefined" ) {
            CKEDITOR.replace('post_body',{
                filebrowserUploadUrl: '{{ route("upload",["_token" => csrf_token() ]) }}',
                filebrowserUploadMethod: 'form'
            });
        }
    </script>
- Adding route and function in a controller to handle uploading file logic
public function uploadImage(Request $request) {
        $CKEditor = $request->input('CKEditor');
        $funcNum  = $request->input('CKEditorFuncNum');
        $message  = $url = '';
        if ($request->hasFile('upload')) {
            $file = $request->file('upload');
            if ($file->isValid()) {
                $filename =rand(1000,9999).$file->getClientOriginalName();
                $file->move(public_path().'/wysiwyg/', $filename);
                $url = url('wysiwyg/' . $filename);
            } else {
                $message = 'An error occurred while uploading the file.';
            }
        } else {
            $message = 'No file uploaded.';
        }
        return '<script>window.parent.CKEDITOR.tools.callFunction('.$funcNum.', "'.$url.'", "'.$message.'")</script>';
    }
- This will upload your attached files to the WYSIWYG folder inside the public folder of the laravel project
- By default, you will not see the tab upload until you did the above configuration
- Viewing CKEditor and try to upload image in your web browser
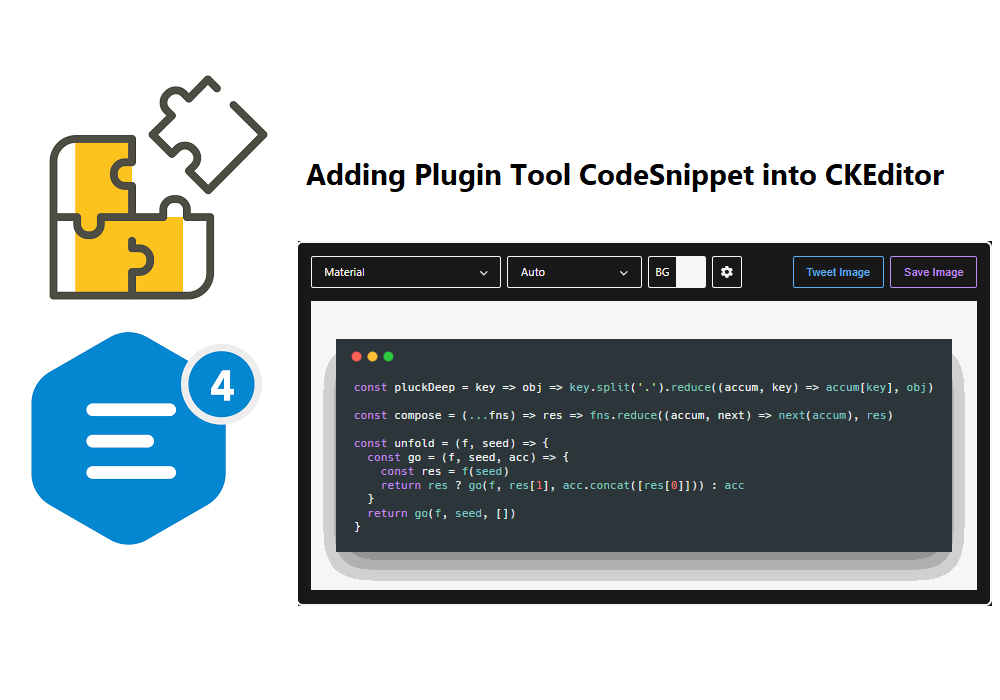
Step 3: Adding CodeSnippet Plug-in to CKEditor https://ckeditor.com/cke4/addon/codesnippet
- First, Download source file of plug-in (CodeSnippet) and put it in the folder plugins of the CKEditor package
- Change original config.js of CKEditor to load newly plug-in codesnippet
- In order to properly display codesnippet style on the target page, you have to include the following lines in your HTML header
<!-- CKEditor -->
<link href="{{asset('js/ckeditor_4.16.1_full/ckeditor/plugins/codesnippet/lib/highlight/styles/monokai_sublime.css')}}" rel="stylesheet">
<script src="{{asset('js/ckeditor_4.16.1_full/ckeditor/plugins/codesnippet/lib/highlight/highlight.pack.js')}}"></script>

<script>hljs.initHighlightingOnLoad();</script>
- Additionally, in order to manage scrolling inside codesnippet, you can use this stylesheet
.hljs{
    display: inline-block !important;
    min-width: 100%;
}
Finally, CKEditor allows you to input content, upload images, and insert codesnippet in order to display as pretty as the image below
About author

SETHA THAY
Software Engineer & Project Manager. I am willing to share IT knowledge, technical experiences and investment to financial freedom. Feel free to ask and contact me.
You may also like